Project Links (Sites) Setup
The Project Links section is the second step in project creation where you define the physical sites or links that make up the project.
Accessing Project Links
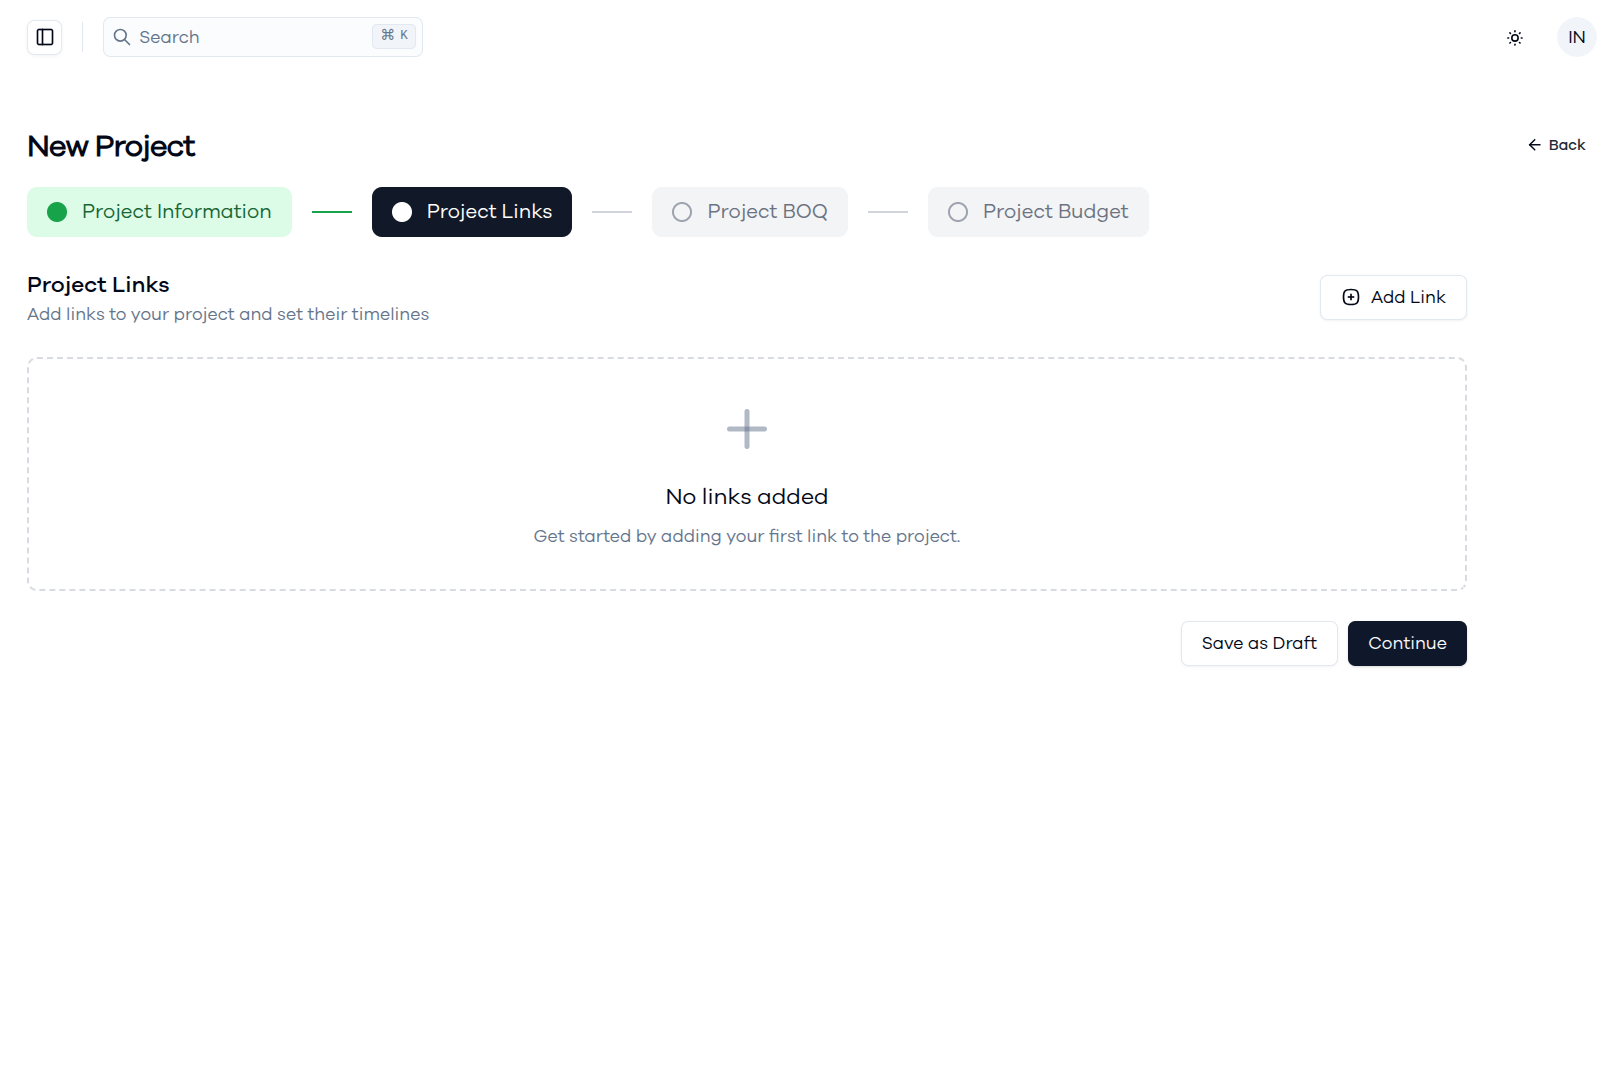
After completing the Project Information step:
- The Project Links tab becomes active (highlighted in the navigation)
- You'll see the Project Links interface with an empty state
- The system displays "No links added" with a prompt to get started
Adding Links to Your Project
1. Initiate Link Addition
To add links to your project:
- Click the Add Link button in the top right corner
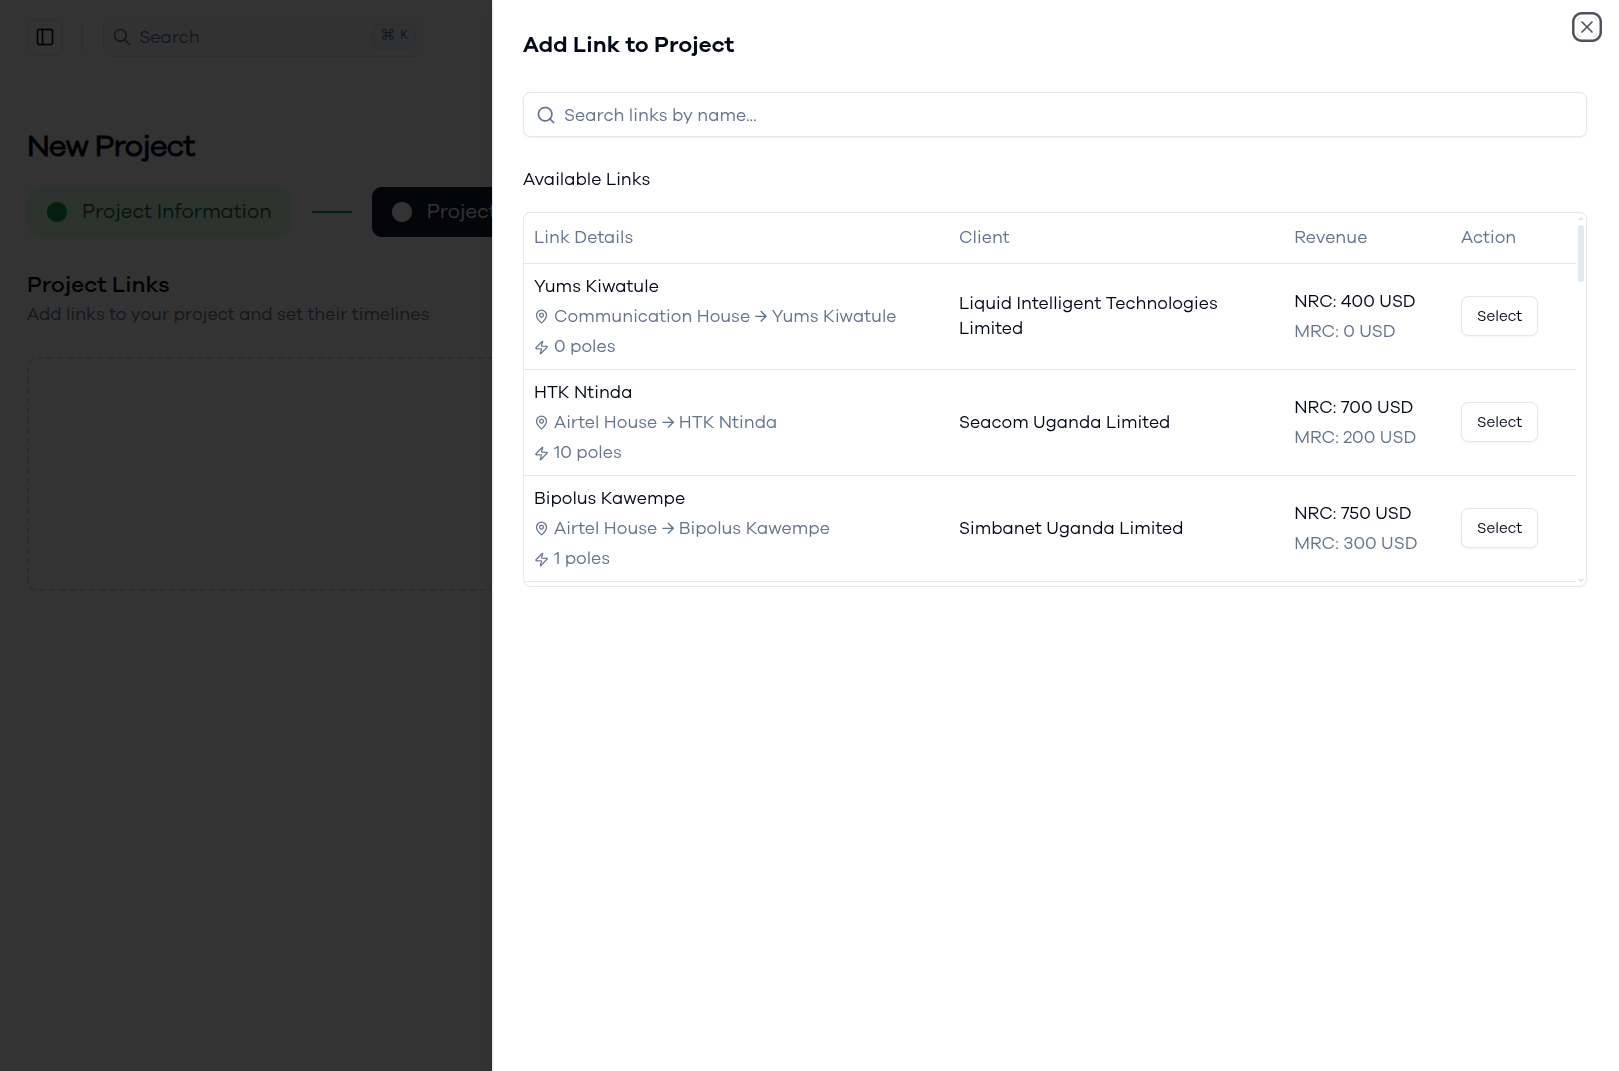
- The "Add Link to Project" dialog will open
- You'll see a searchable list of available links in the system. These Links will have to be set prior under the Links module under the Settings section of the Project Management module.
2. Browse and Search Available Links
The Add Link dialog provides:
Search Functionality:
- Use the search bar to find links by name
- Search filters help locate specific links quickly
Available Links Display: Each link shows:
- Link Name - The identifier for the connection
- Route Information - Start and end points (e.g., "Communication House → Yums Kiwatule")
- Infrastructure Details - Number of poles required
- Client Information - Associated client company
- Revenue Breakdown - NRC (Non-Recurring Cost) and MRC (Monthly Recurring Cost)
3. Select Links for Your Project
To add a link to your project:
- Review the link details including route, client, and revenue information
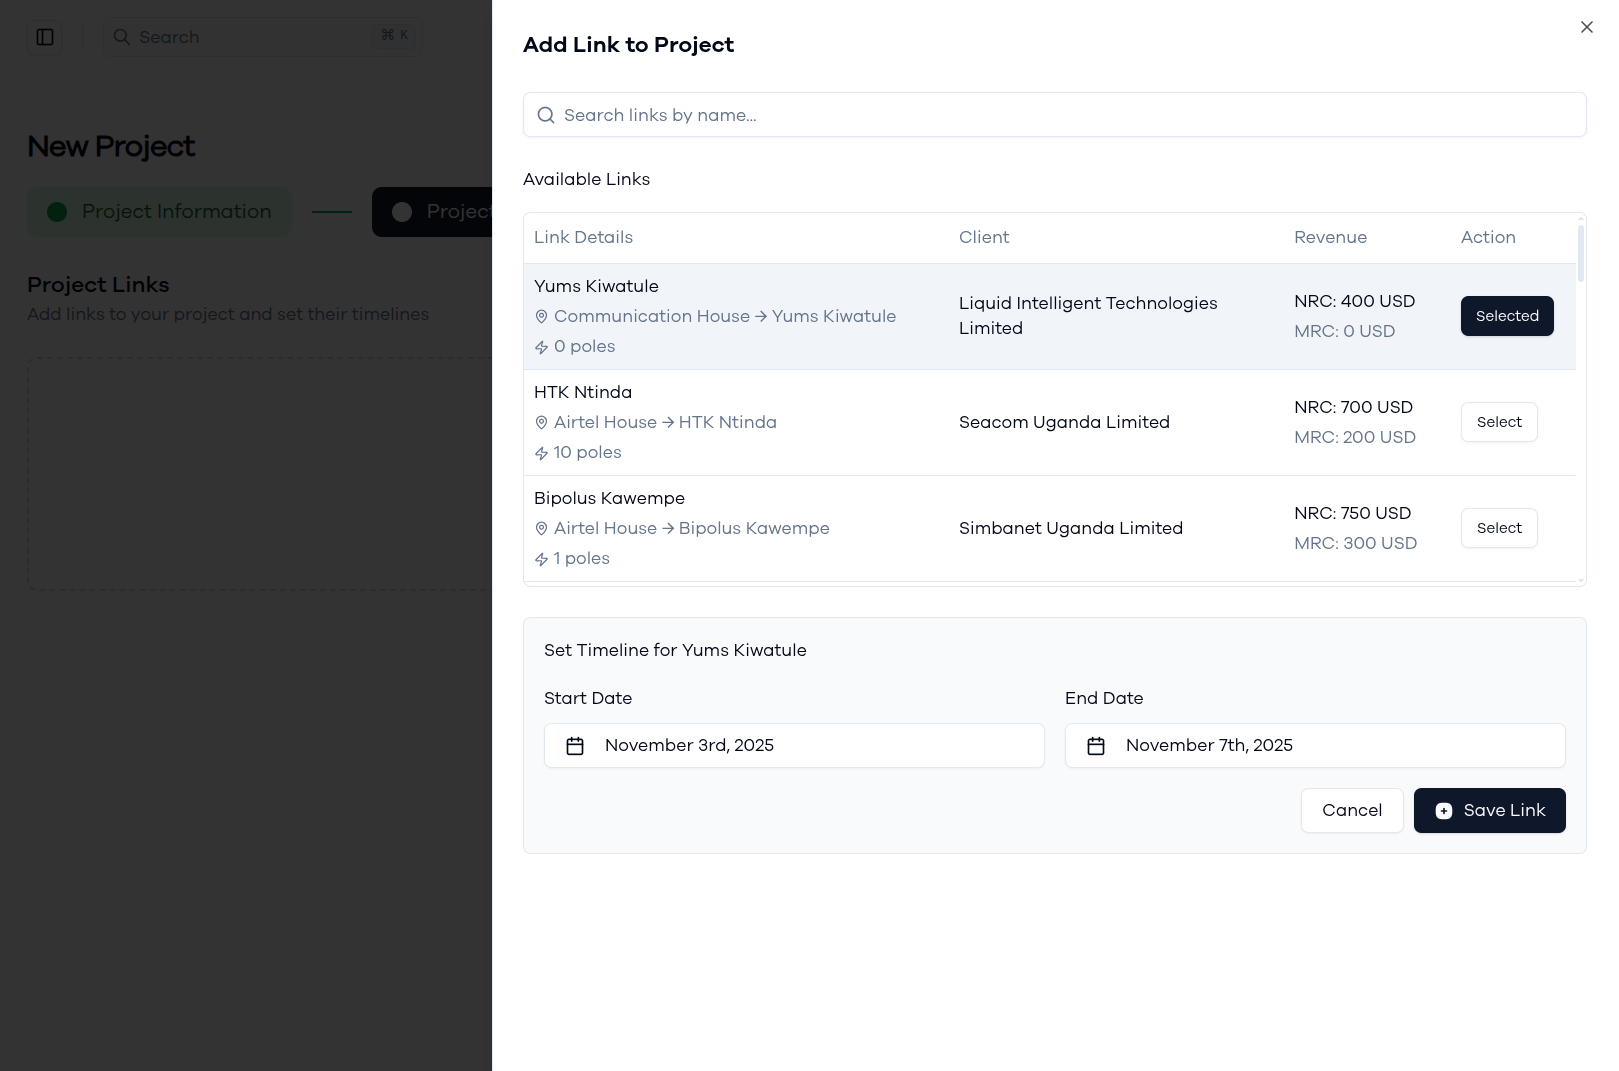
- Click the Select button next to the desired link
- The button will change to Selected to confirm your choice
4. Set Link Timeline
Once you select a link, you'll need to define its project timeline:
Timeline Configuration:
- Start Date - When work on this link will begin
- End Date - Expected completion date for this link
- Use the date pickers to select appropriate dates
Timeline Considerations:
- Each link can have its own timeline within the overall project
- Consider dependencies between links when setting dates
Saving the Link:
- Set both start and end dates
- Click Save Link to add it to your project
- The dialog will close and return you to the project links overview
5. Review Added Links
After adding links, you'll see them listed in the Project Links section:
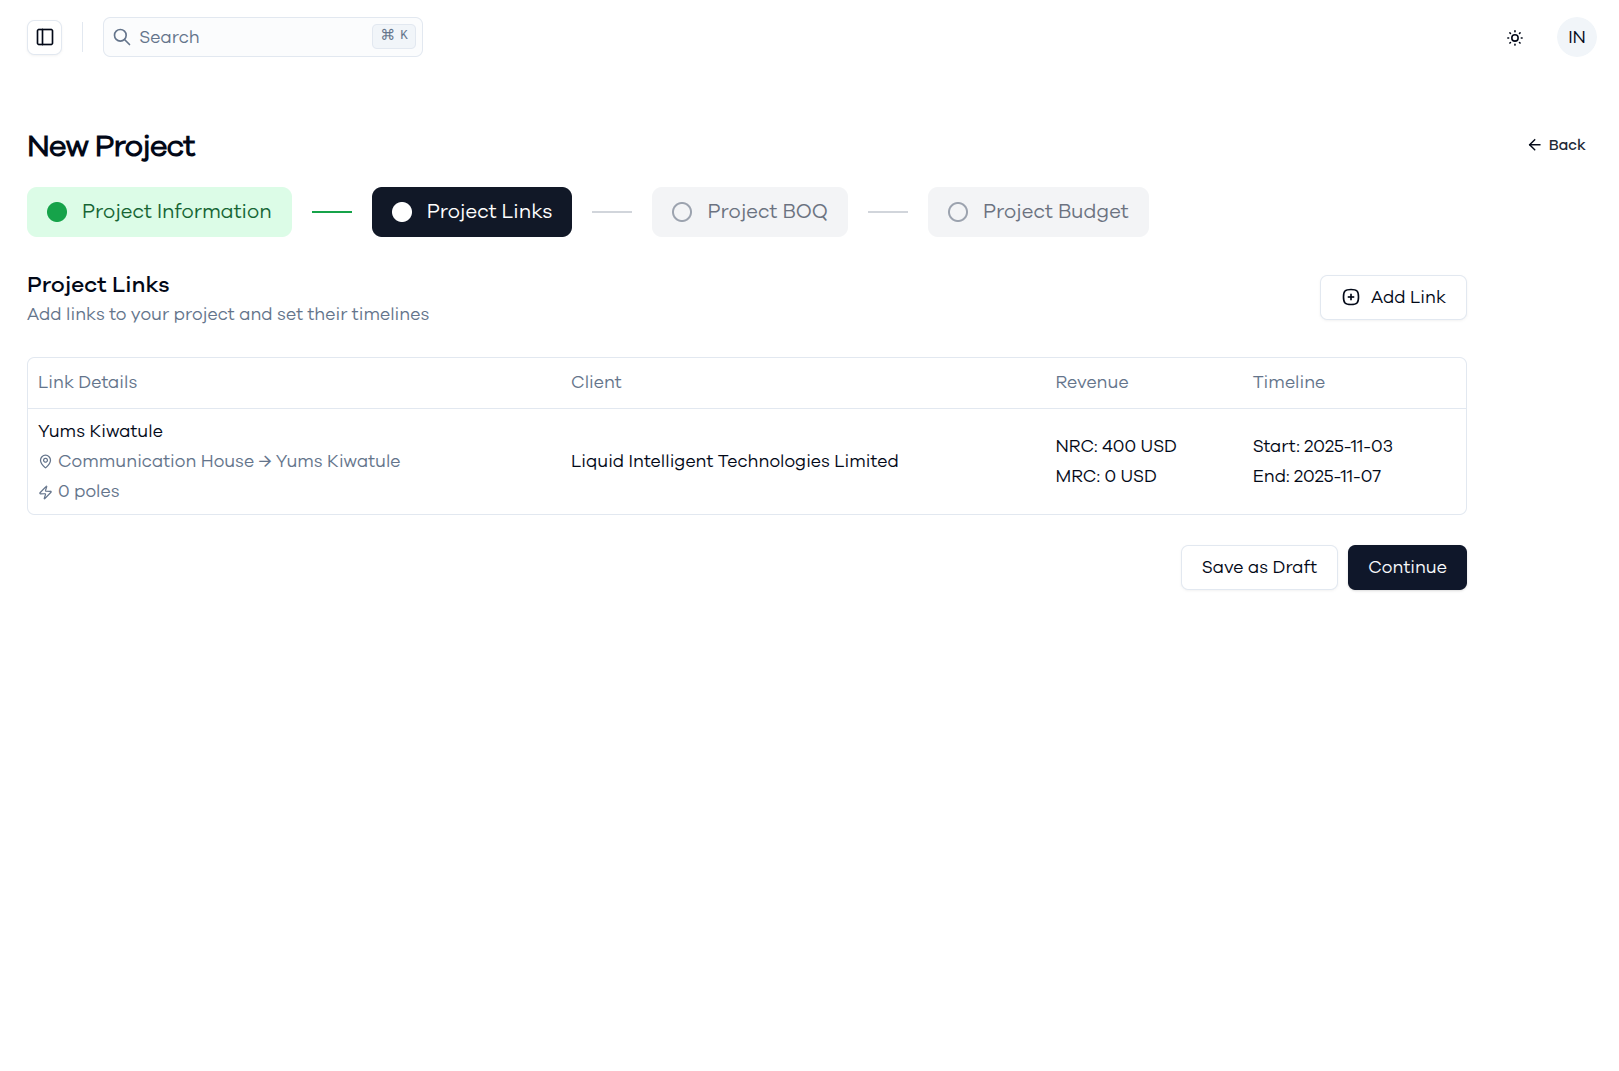
Link Information Display:
- Link Details - Name and route information
- Client - Associated client company
- Revenue - NRC and MRC breakdown for financial planning
- Timeline - Start and end dates for project scheduling
6. Complete Links Setup
When you're satisfied with your link configuration:
Options Available:
- Add Link - Continue adding more links to the project
- Save as Draft - Save your progress without proceeding
- Continue - Move to the next step (Project BOQ)
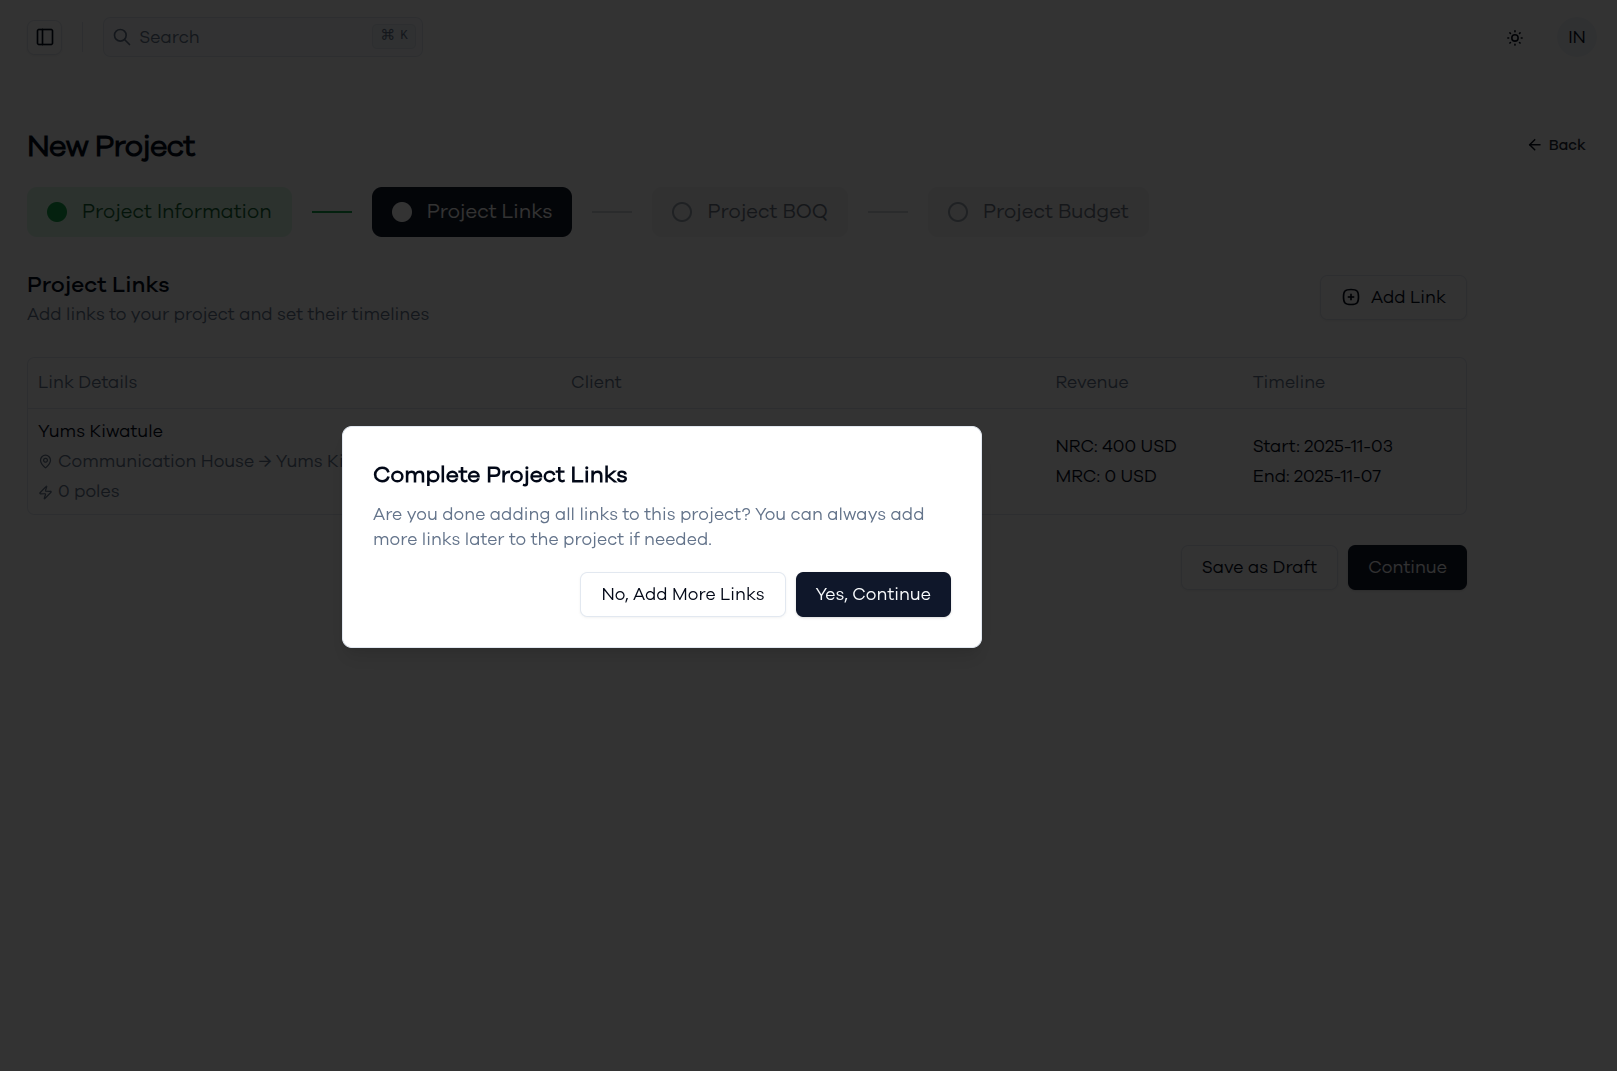
Completion Confirmation: The system will ask if you're done adding links:
- "No, Add More Links" - Continue adding additional links
- "Yes, Continue" - Proceed to the BOQ (Bill of Quantities) step
Next Steps
After completing the Project Links setup:
- The Project BOQ tab becomes available
- You can proceed to define material requirements for each link
- Timeline information feeds into overall project scheduling
Editing Links Later
Draft Projects:
- Links can be modified while the project is in draft status or has not been submitted for approval yet
- Use "Save as Draft" to preserve changes without completing the whole project creation process