Project Information Setup
The Project Information section is the first and foundational step in creating a new project. This section captures essential project details that will be used throughout the project lifecycle for identification, management, and reporting purposes.
Accessing Project Creation
To begin creating a new project:
- Navigate to the Project Management module
- Go to Projects section
- Click New Project
- The project creation wizard will open with the Project Information tab active
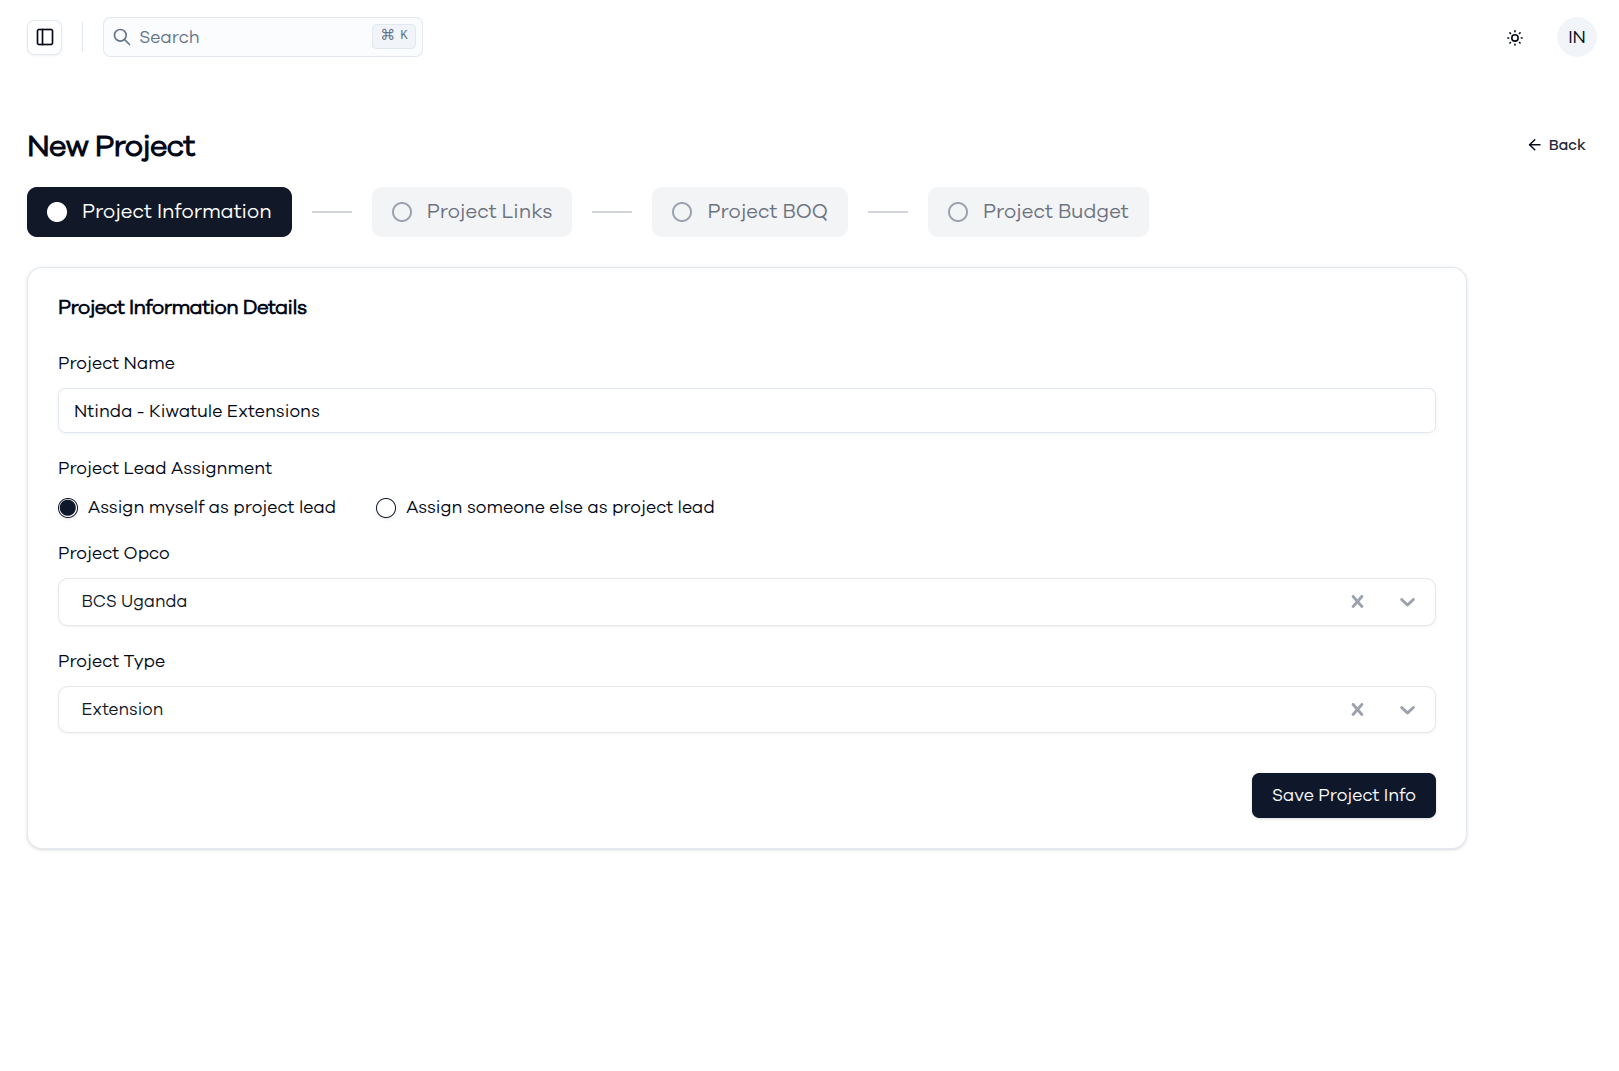
Project Information Details
1. Project Name
Required Field
- Enter a descriptive and unique name for your project
- Use clear naming conventions that help identify the project's purpose and location
2. Project Lead Assignment
Required Field Choose between two options for project leadership:
Option A: Assign Myself as Project Lead
- Select this option if you will be managing the project directly
- Your user account will be automatically assigned as the project lead
- You'll have full access to all project functions and approvals
Option B: Assign Someone Else as Project Lead
- Select this option to delegate project management to another team member
- When selected, a Project Lead dropdown will appear
- Choose the appropriate team member from the list of available project managers
- The selected person will have access to manage the assigned project
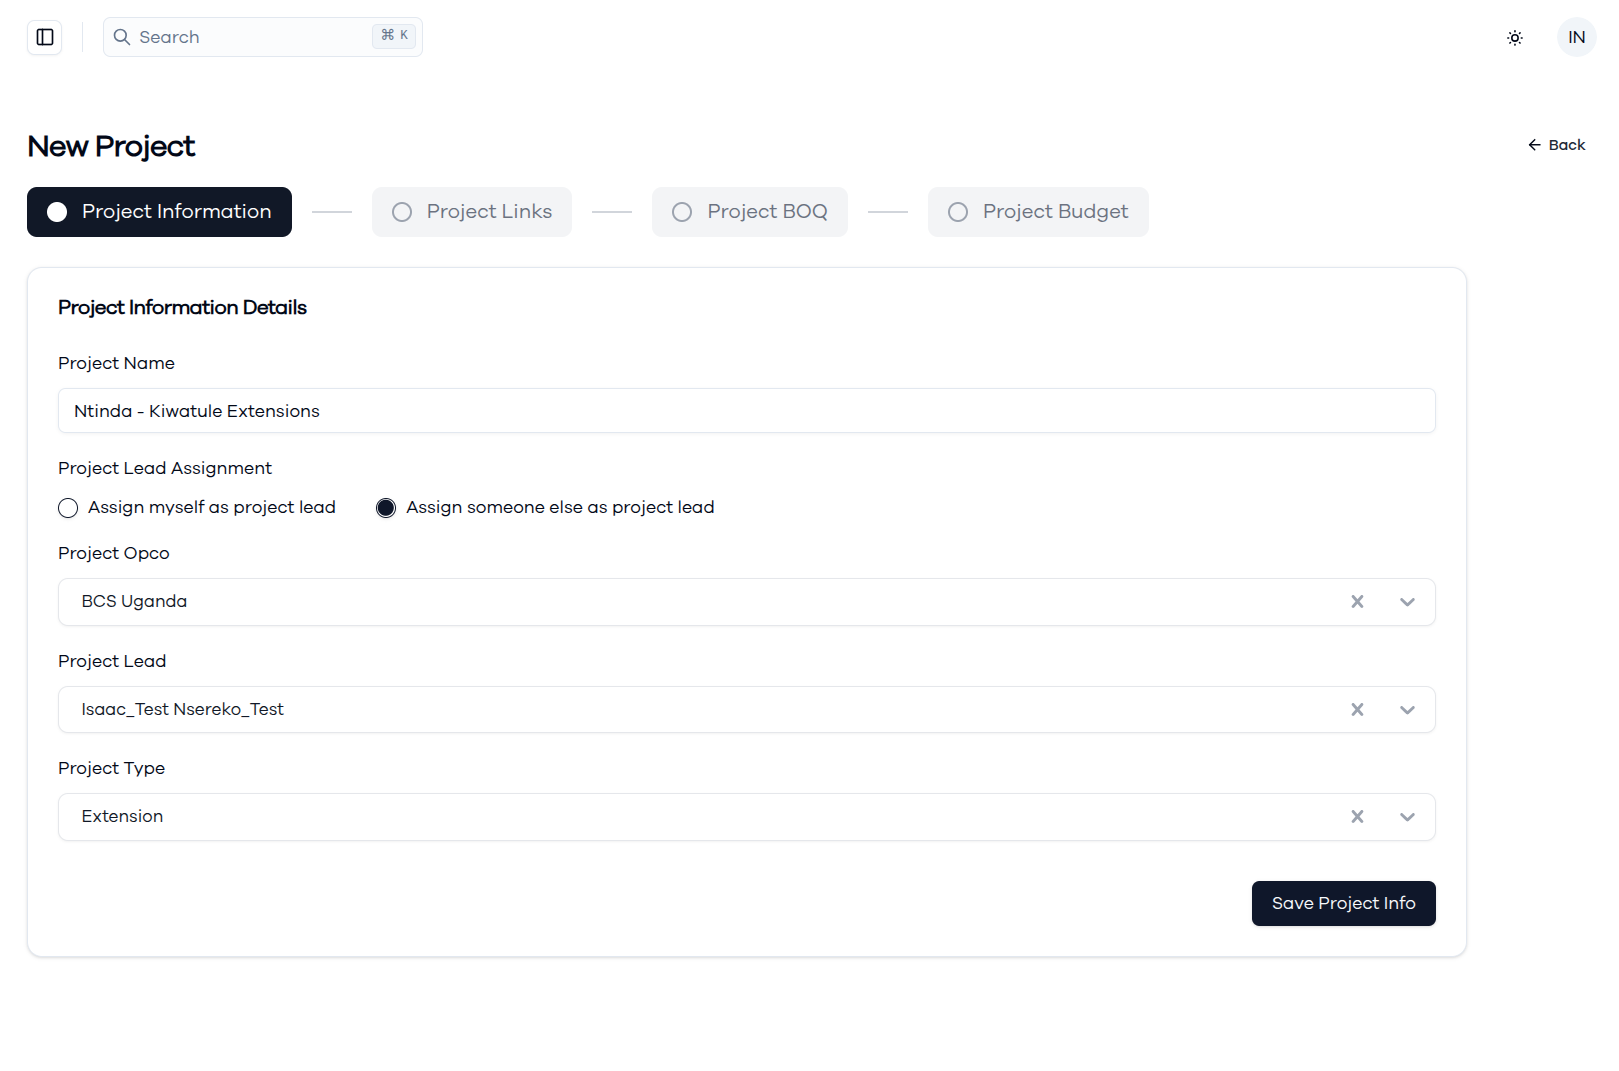
3. Project OPCO (Operating Company)
Required Field
- Select the Operating Company under which this project will operate
- This determines the country/region context for the project
- Example: "BCS Uganda"
4. Project Type
Required Field
- Choose the category that best describes the project
- The available types are; Backbone Build and Extension
Completing Project Information
Save Project Information
Once all required fields are completed:
- Review all entered information for accuracy
- Click Save Project Info button at the bottom right
- The system will validate all required fields
- Upon successful save, you'll proceed to the next step: Project Links
Validation Requirements
Before saving, ensure:
- ✅ Project Name is unique and descriptive
- ✅ Project Lead is assigned (either yourself or another team member)
- ✅ Project OPCO is selected
- ✅ Project Type is chosen
Next Steps
After successfully saving the project information:
- The Project Links tab will become available
- You can proceed to define project sites and links
- Project information can be edited later from the project details page before it is submitted for approval