Project Budget Configuration
The Project Budget is the fourth and final configuration step in project creation. This comprehensive step-by-step process allows you to create a complete budget by first establishing basic budget details, then adding line items (both material and cash expenses), and finally generating a budget summary.
Step 1: Access Project Budget
After completing the Project BOQ step:
- The Project Budget tab becomes active in the navigation
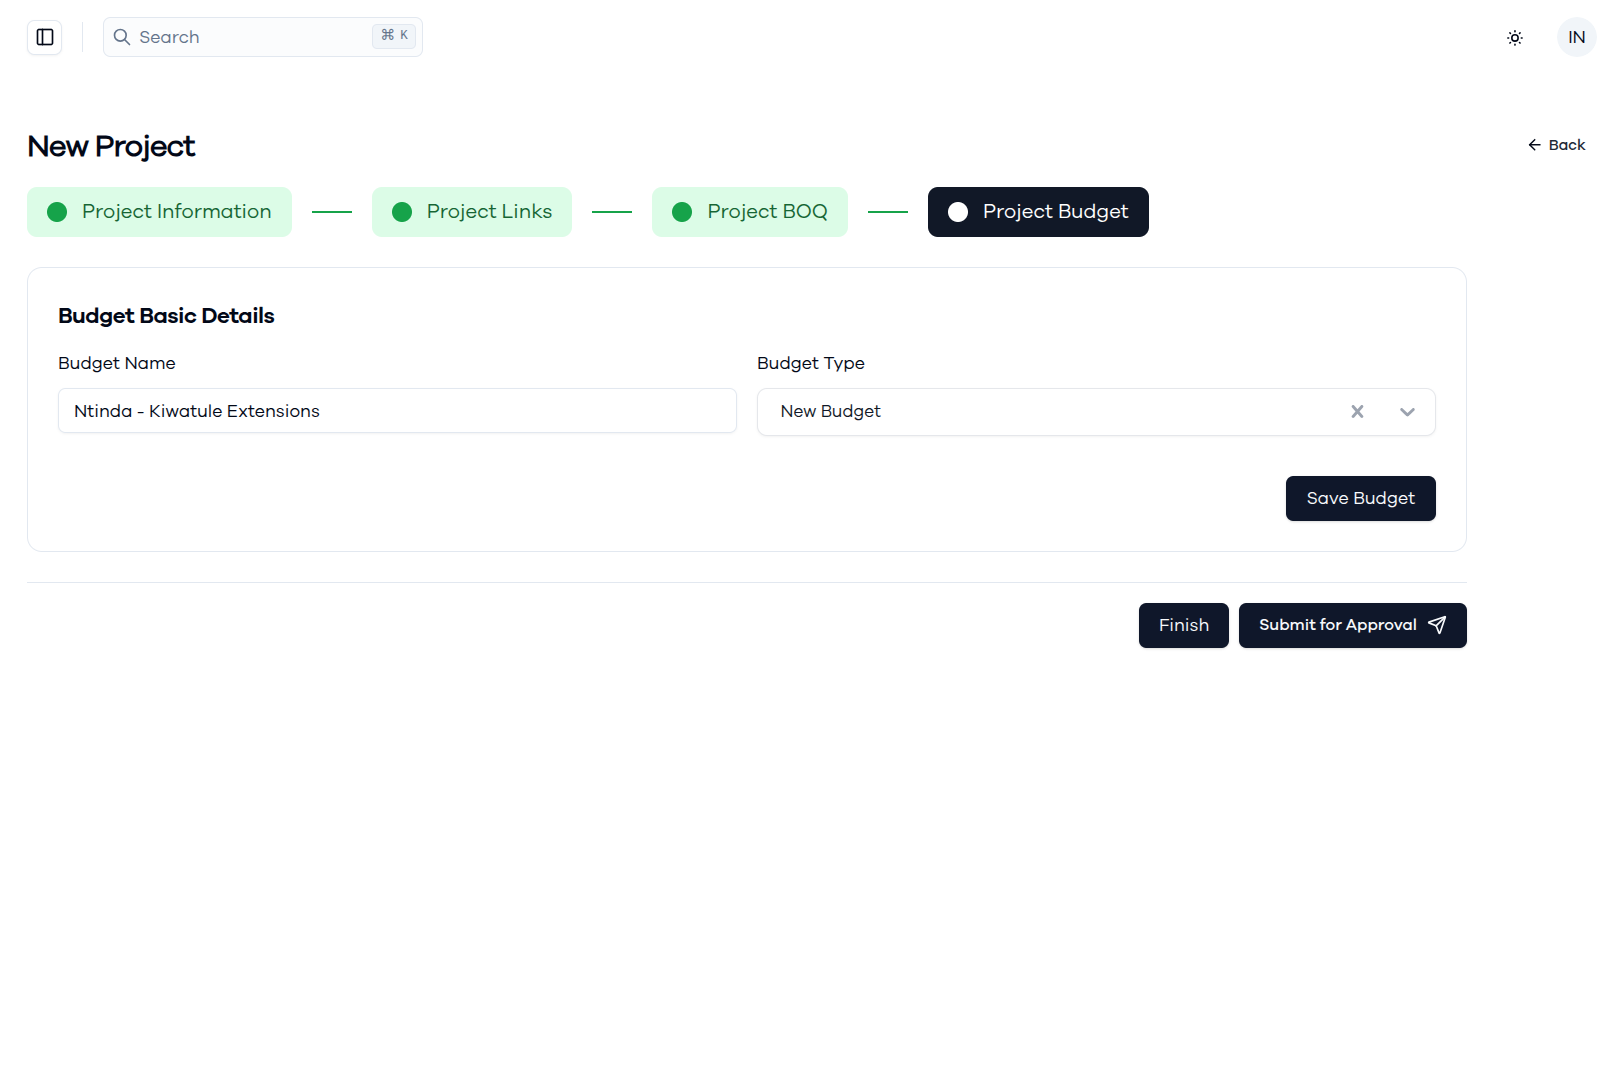
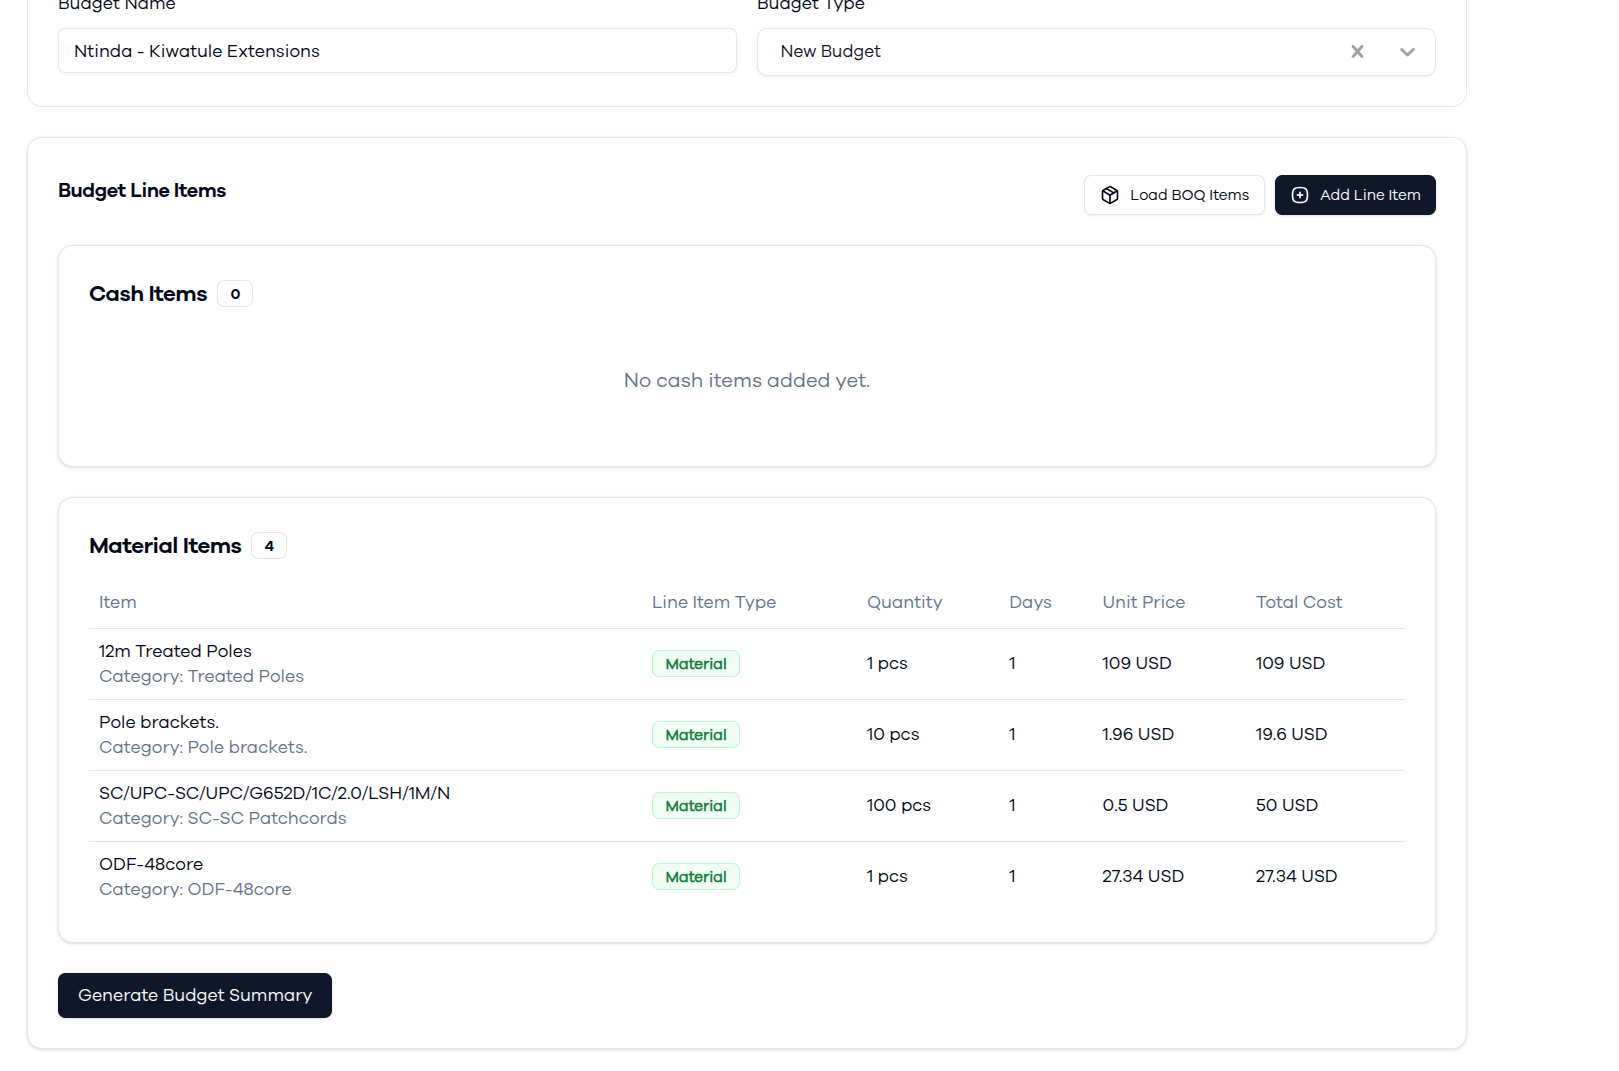
- You'll begin with the budget basic details configuration
Step 2: Configure Budget Basic Details
Budget Information Setup
Start by setting up the fundamental budget information:
Budget Name:
- Automatically populated based on the project name
- Format: "[Project Name] - [Extension/Build Type]"
- Example: "Ntinda - Kiwatule Extensions"
- Can be edited if a different naming convention is preferred
Budget Type:
- Default selection is "New Budget", the other type is Supplementary budget.
- Indicates this is a fresh budget creation for the project
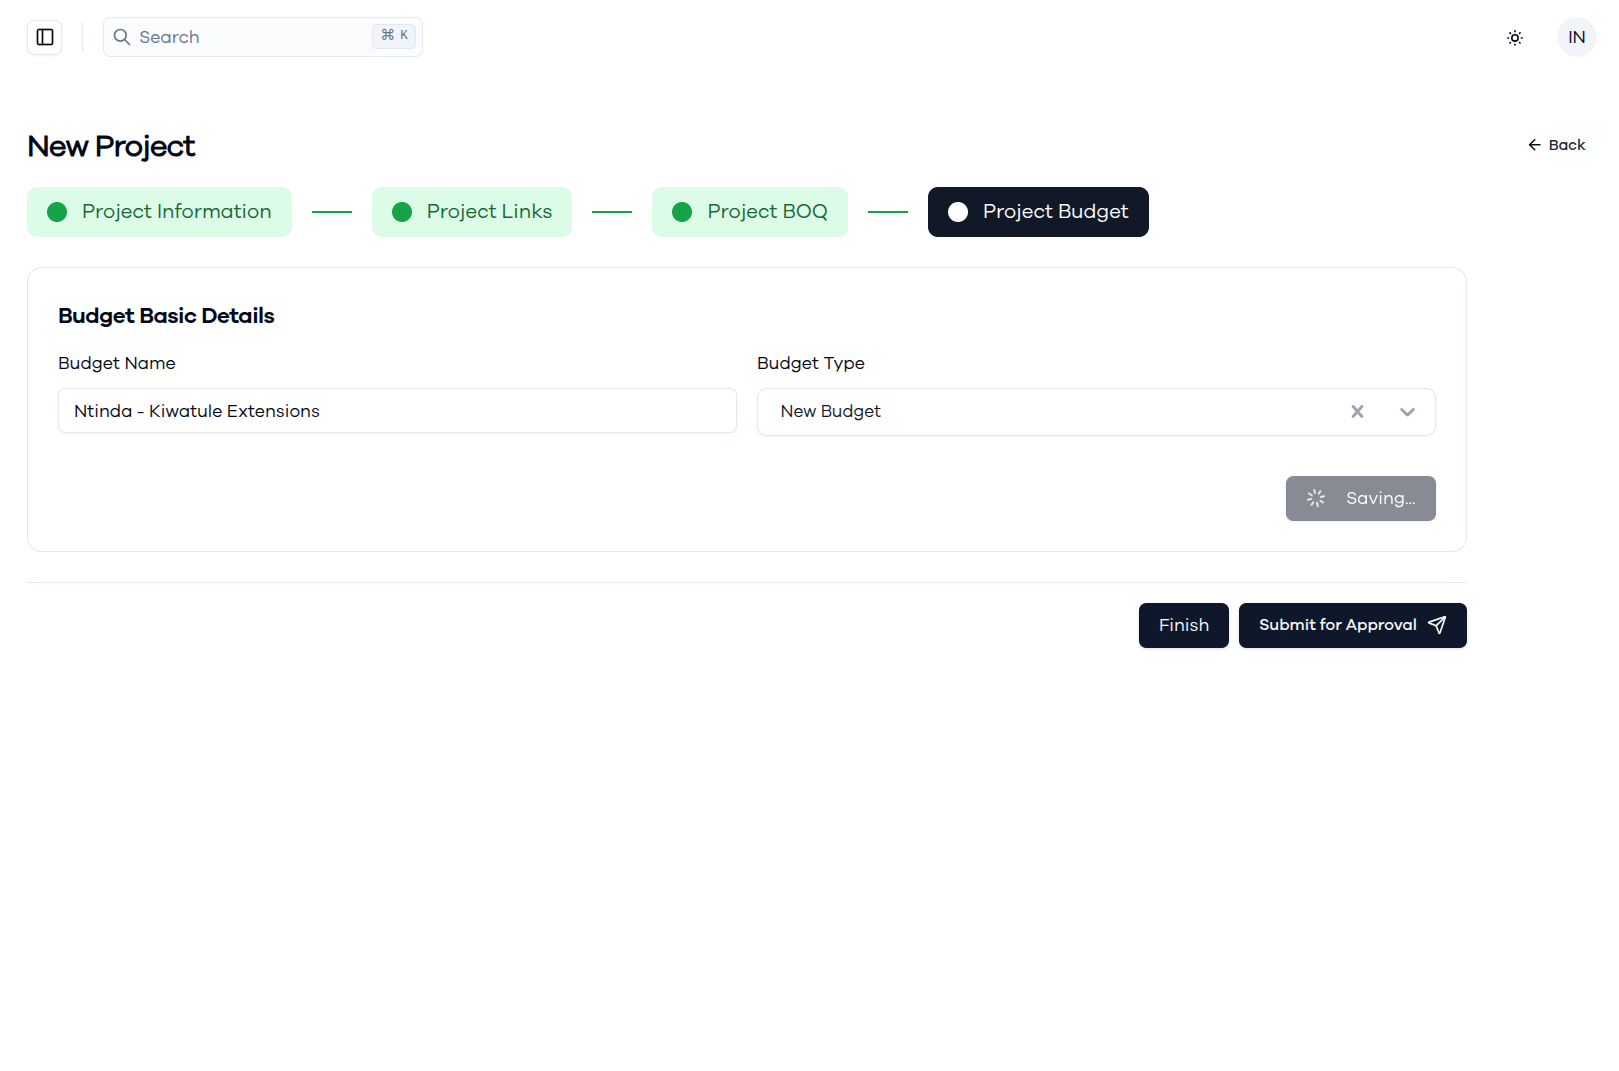
Save Budget Basic Information
- Review the budget name and type settings
- Click Save Budget button (top right)
- The system will save the basic budget
- Upon successful save, you'll proceed to the Budget Line Items section
Step 3: Budget Line Items Management
After saving the basic details, the Budget Line Items section becomes available for configuring the actual budget content. Follow this sequence to properly build your budget:
3A. Load BOQ Items to Budget
Purpose:
- Import BOQ items from the project links into the budget
- Provides access to all materials defined in the Project BOQ step
Process:
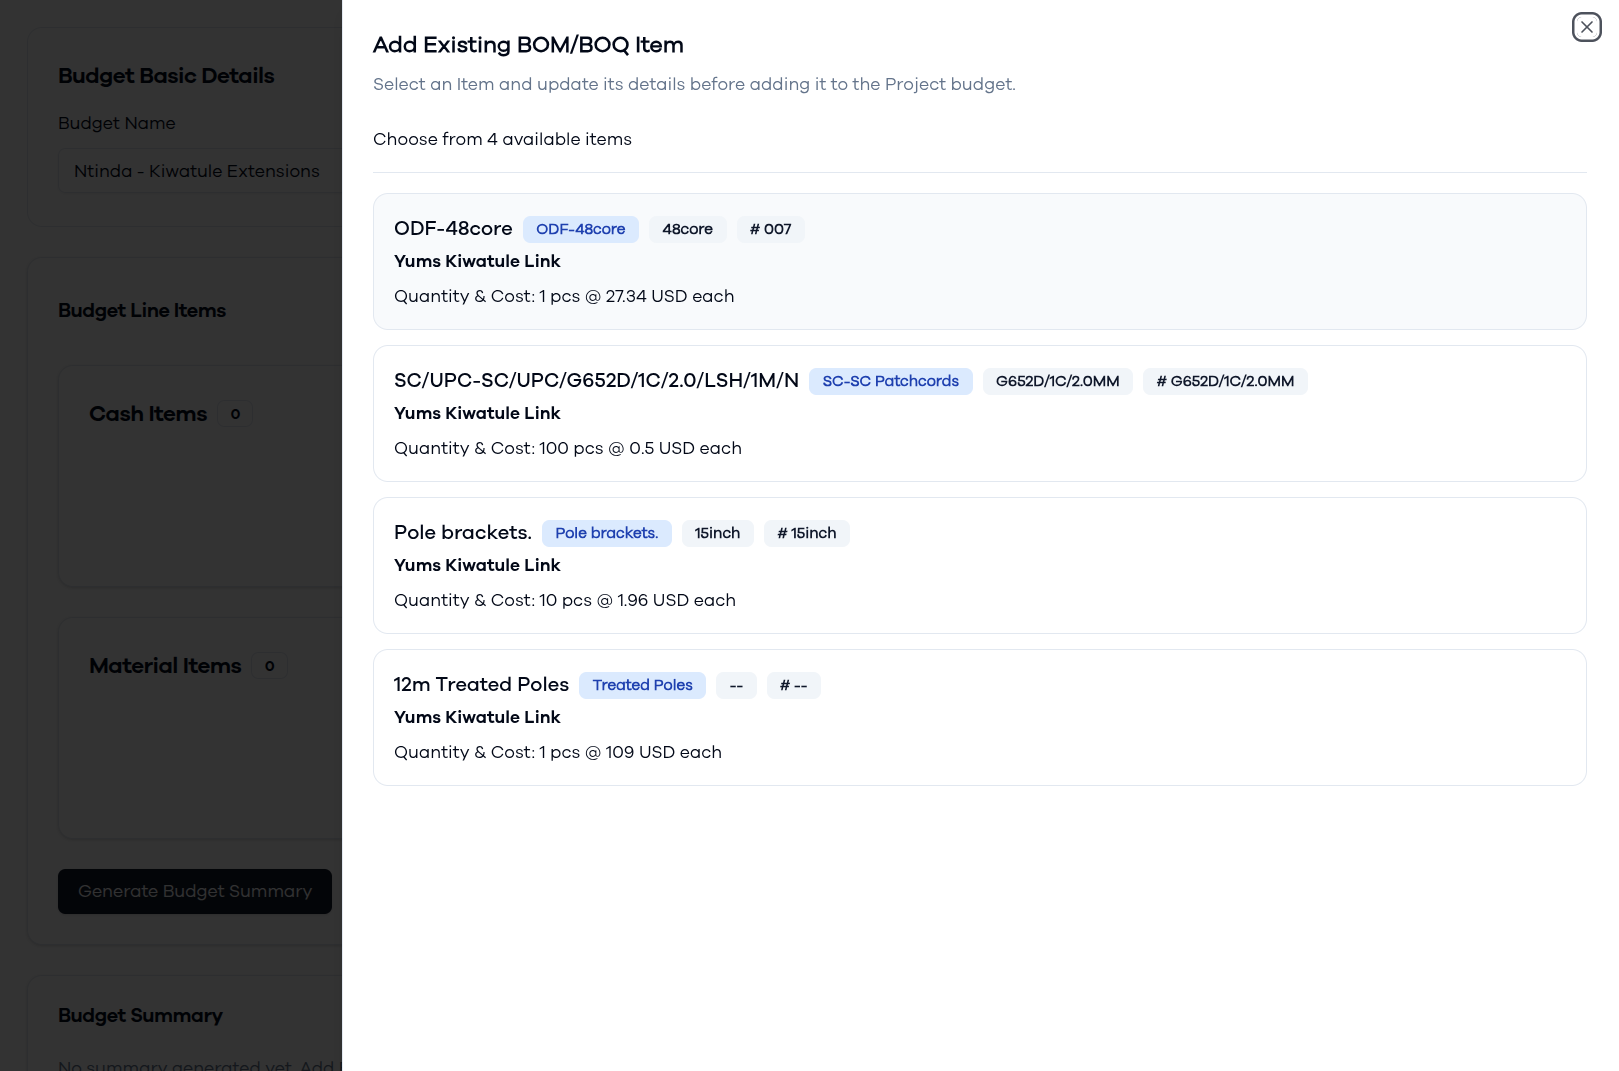
- Click the Load BOQ Items button in the Budget Line Items section
- Opens a dialog with available BOQ items from the project links
BOQ Item Selection Process:
-
Browse Available Items:
- View items organized by categories
- See details like product codes, specifications, and costs
- Items show quantity and cost information
-
Select BOQ Item:
- Click on the desired item to select it
- Item details expand to show configuration options
-
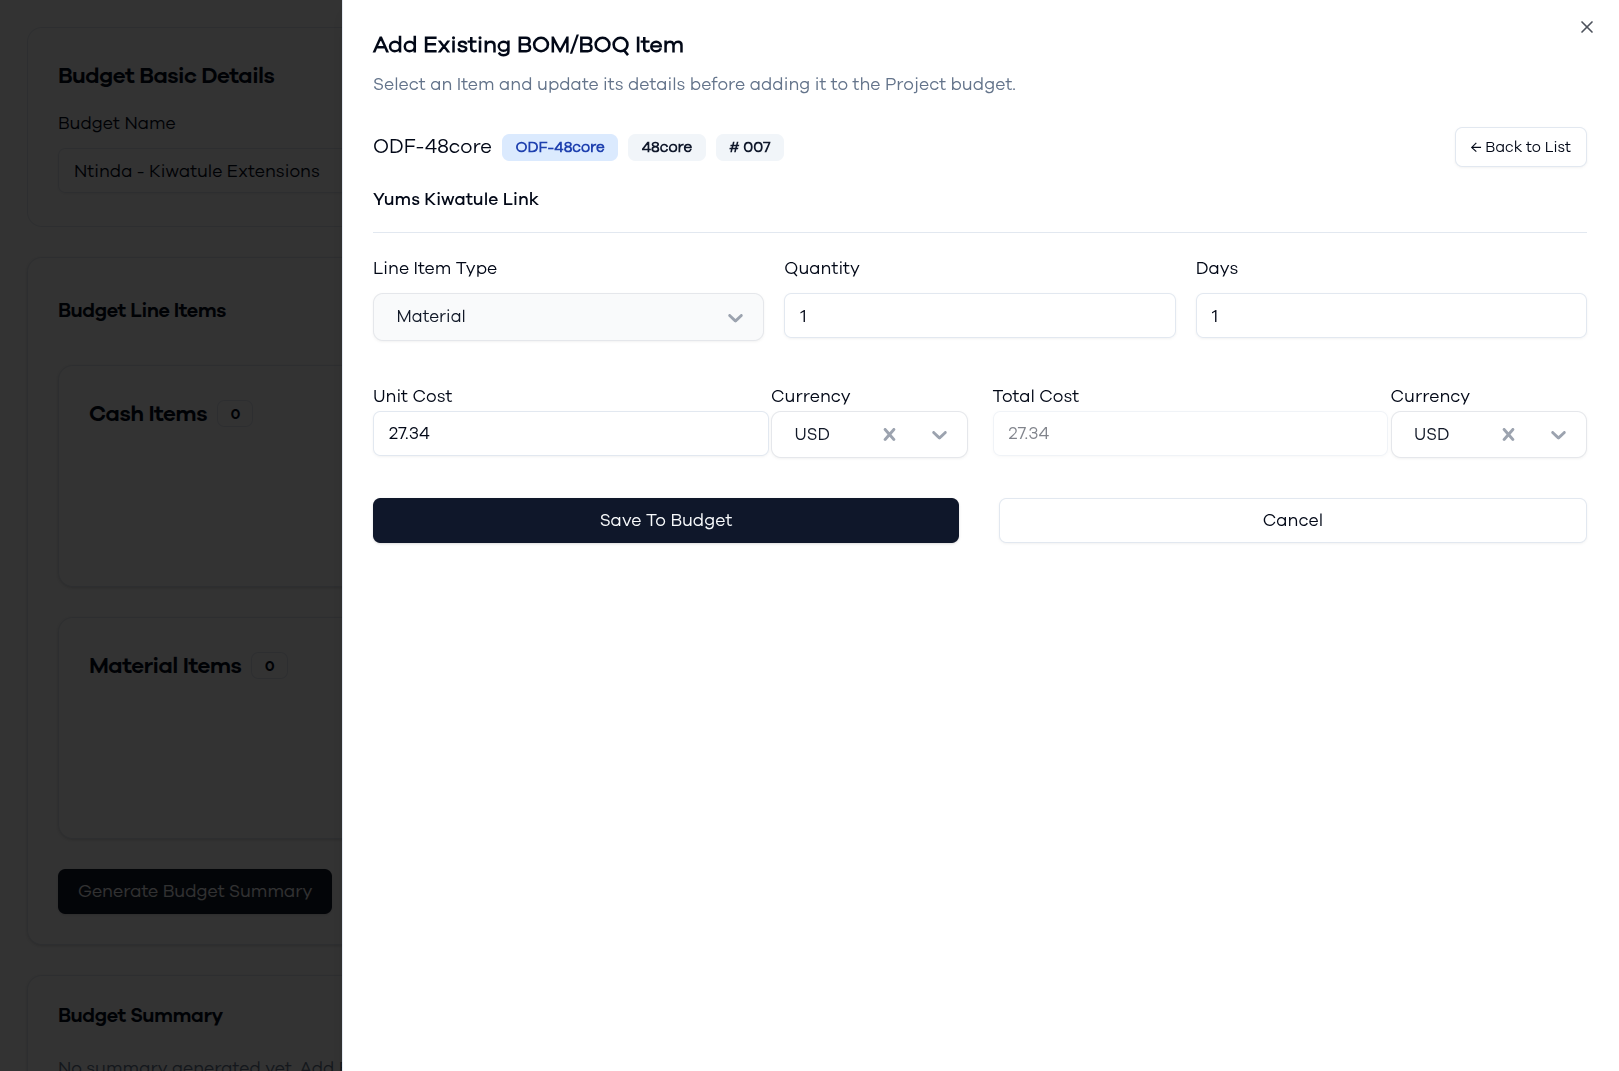
Configure BOQ Item:
- Line Item Type: Automatically set as "Material"
- Quantity: Adjust if different from BOQ specification
- Days: Set duration (typically 1 for materials)
- Unit Cost: Pulled from catalog (27.34 USD example)
- Currency: Display currency for costs
- Total Cost: Auto-calculated based on quantity
-
Add to Budget:
- Click Save To Budget to include the item
- System shows "Adding To Budget..." processing indicator
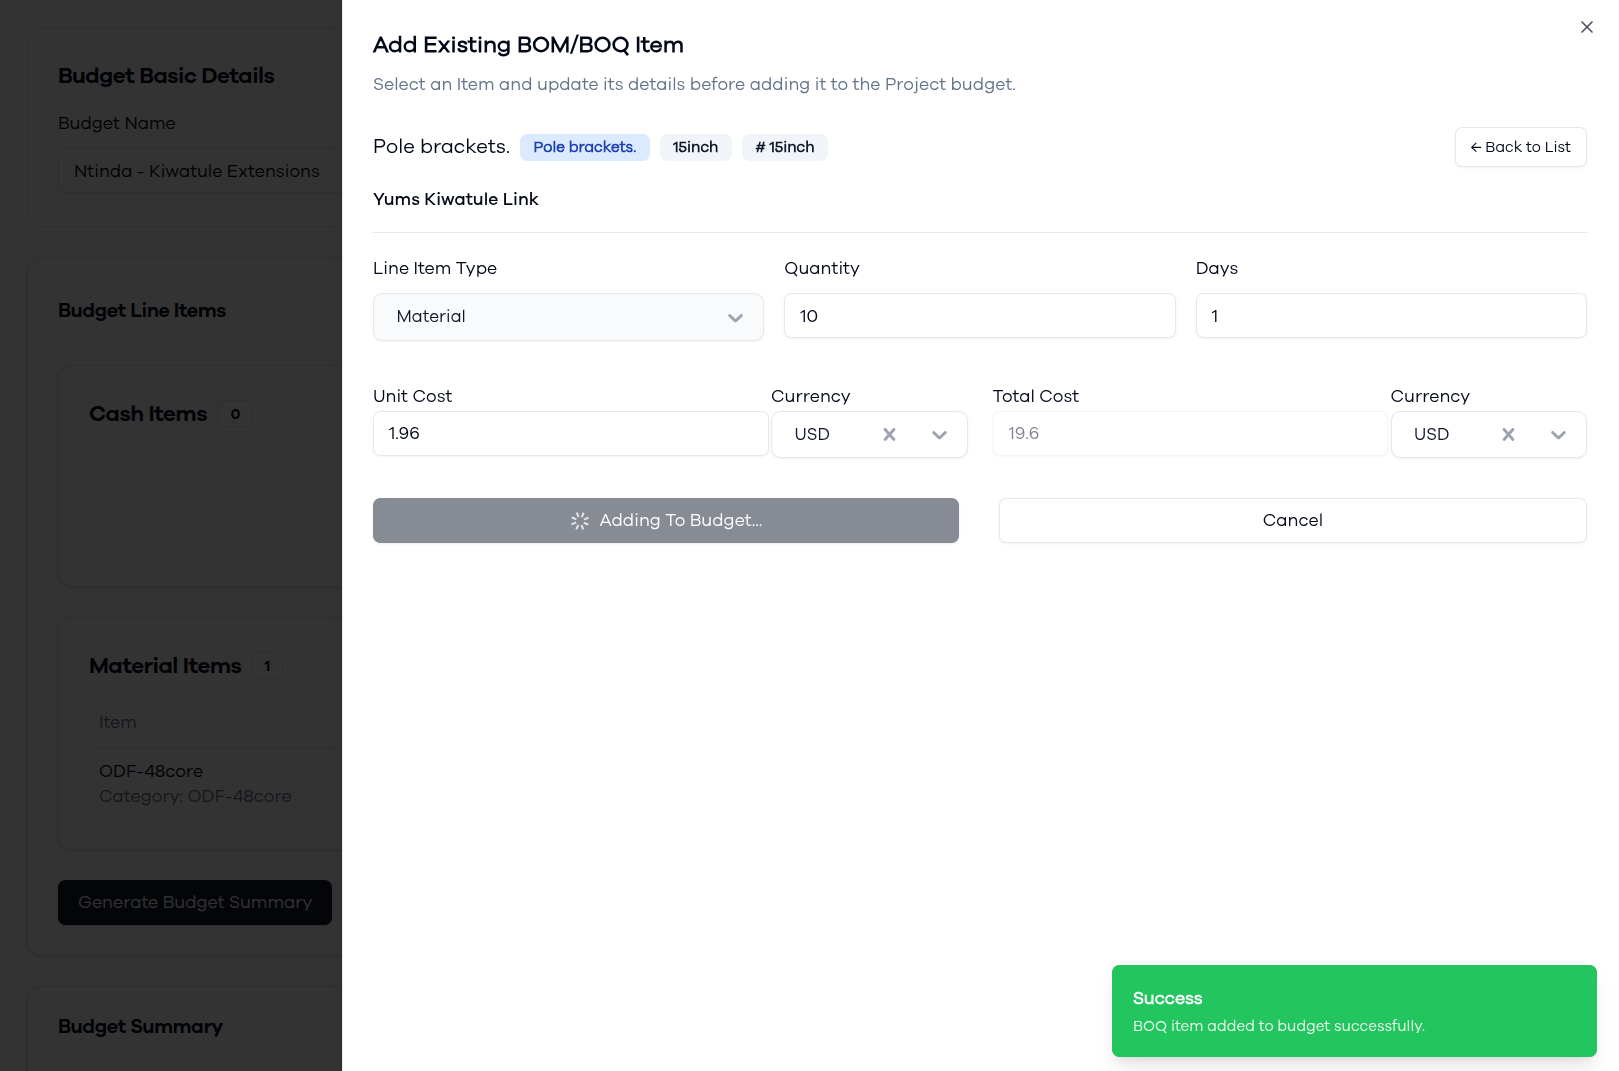
- Success Confirmation:
- Green success notification: "BOQ Item added to budget successfully"
- Item appears in the Material Items section of the budget
3B. Review Material Items Section
After Loading BOQ Items:
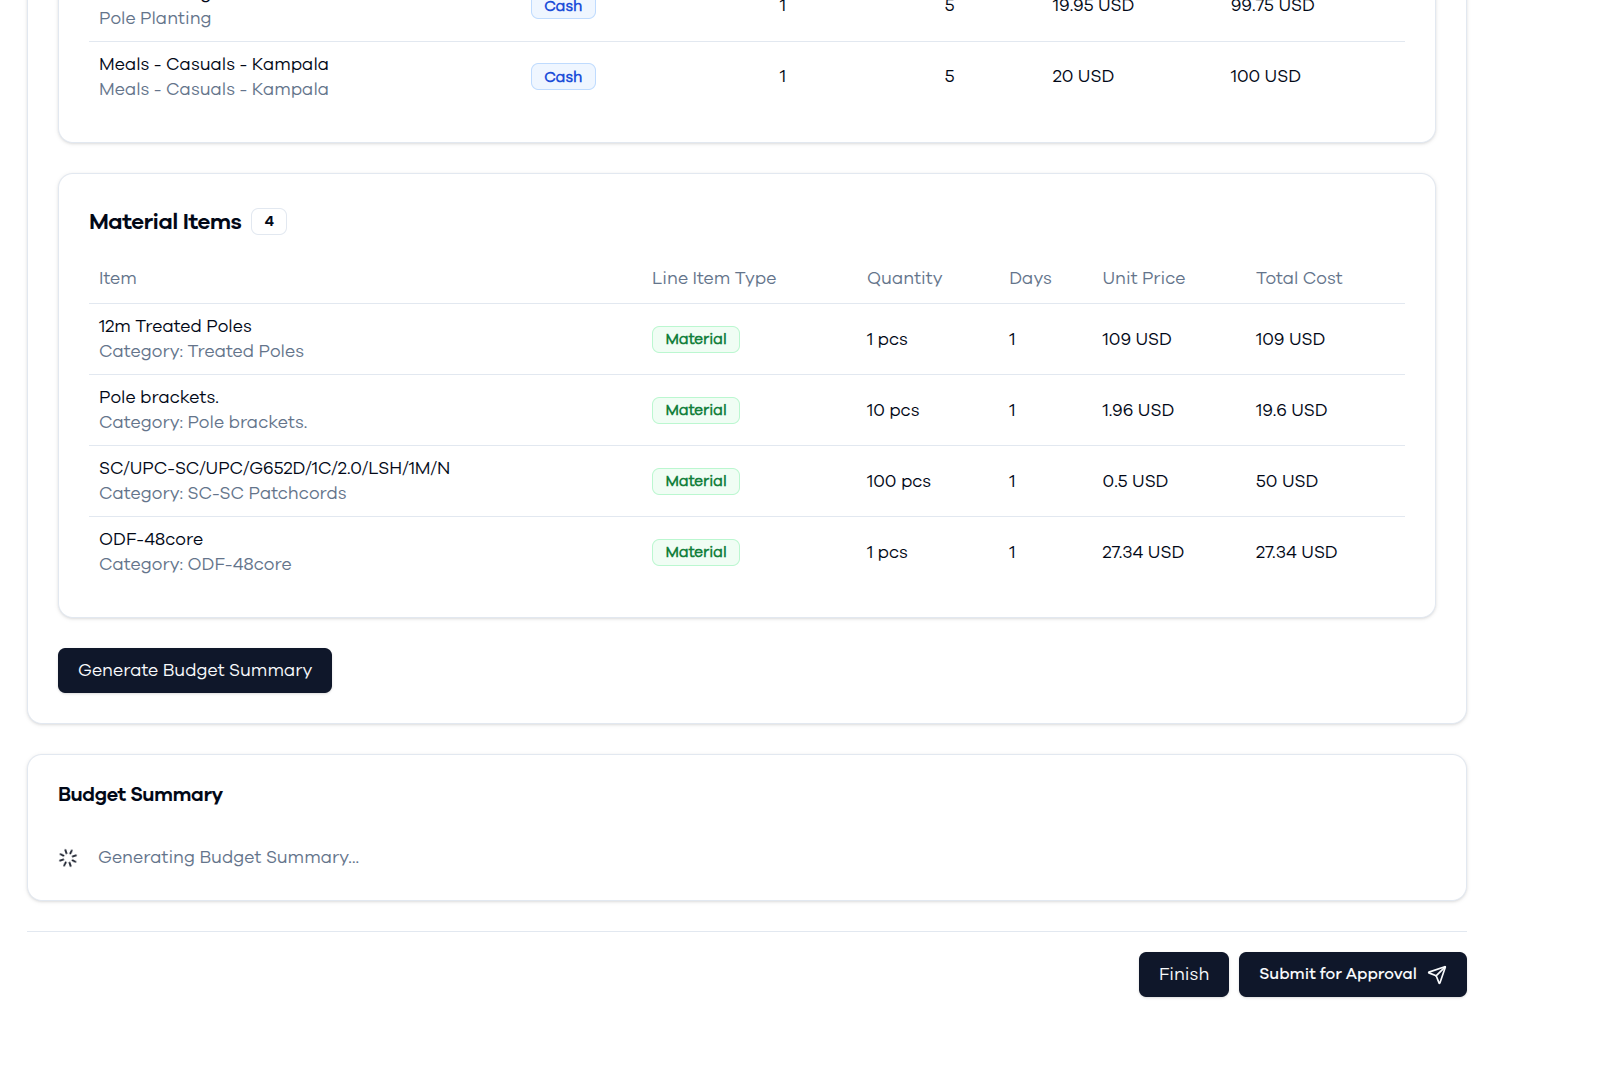
- All loaded materials are displayed in the Material Items section
- Shows equipment, cables, and infrastructure components required
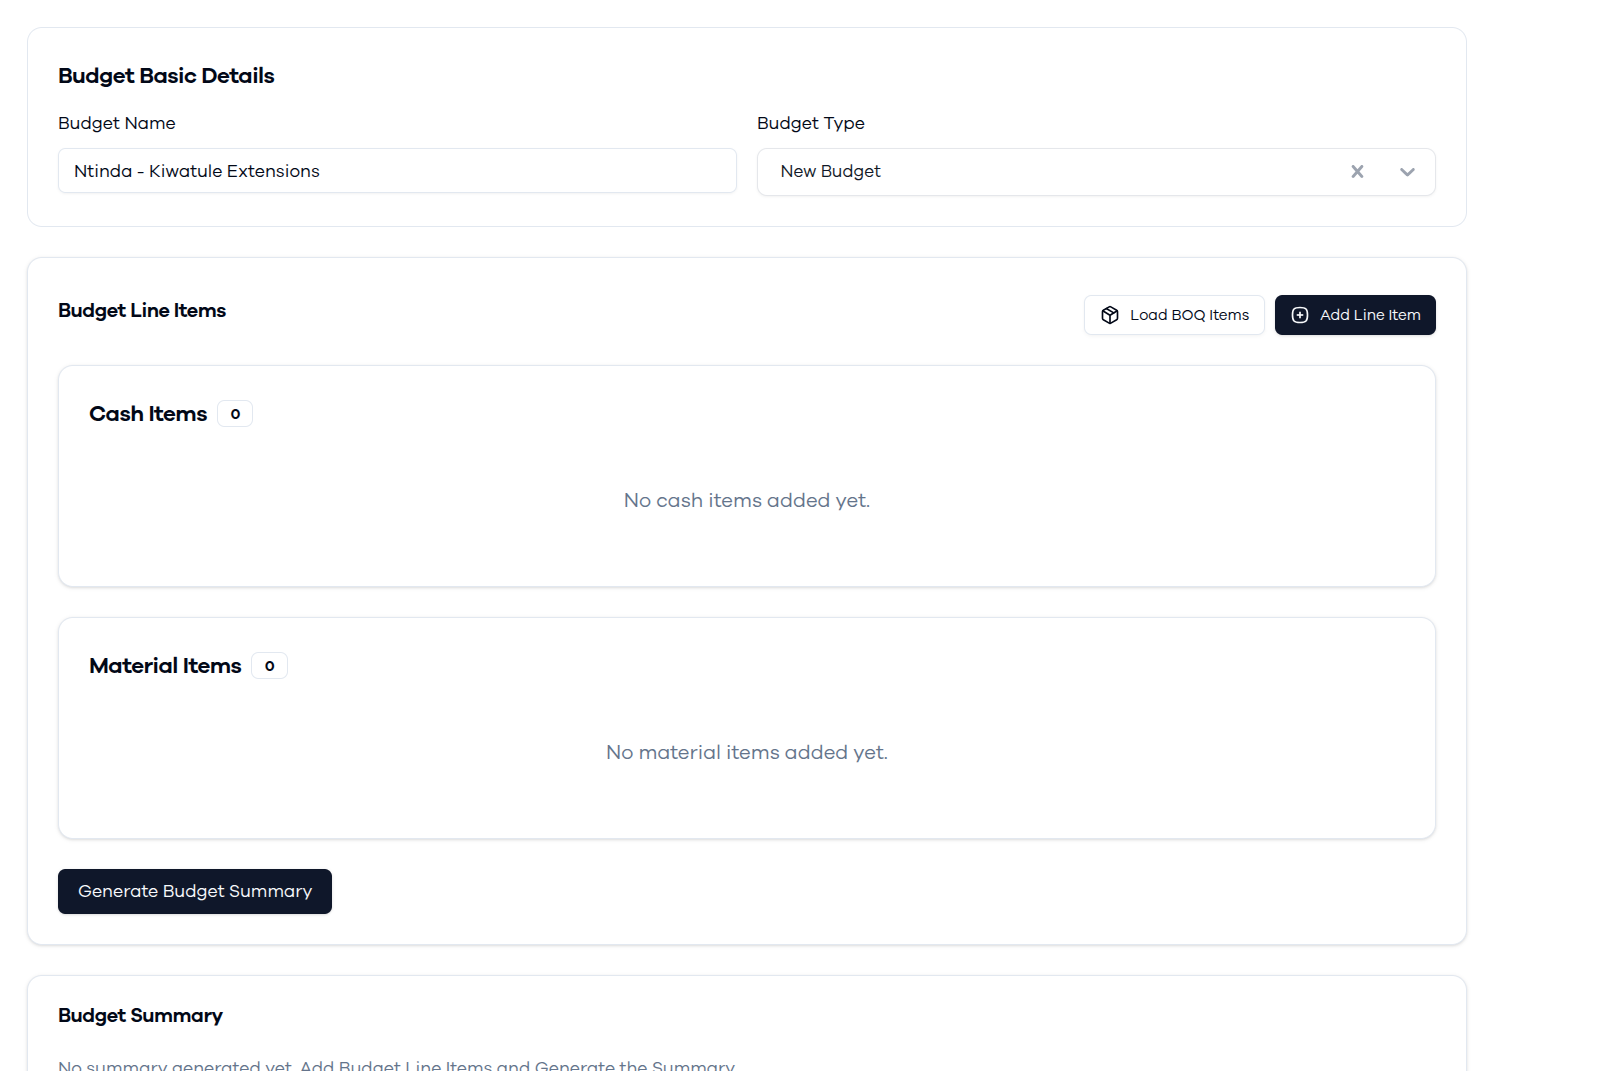
Material Items Information:
- Item: Product name and category
- Line Item Type: Shows "Material" badge
- Quantity: Number of units with measurement (pcs, meters, etc.)
- Days: Usage duration (typically 1 for materials)
- Unit Price: Cost per unit in specified currency
- Total Cost: Calculated total for the material
3C. Add Cash Items to Budget
Purpose:
- Add operational expenses, services, and non-material costs
- Covers labor, transportation, meals, accommodation, and other cash expenditures
Adding Cash Items:
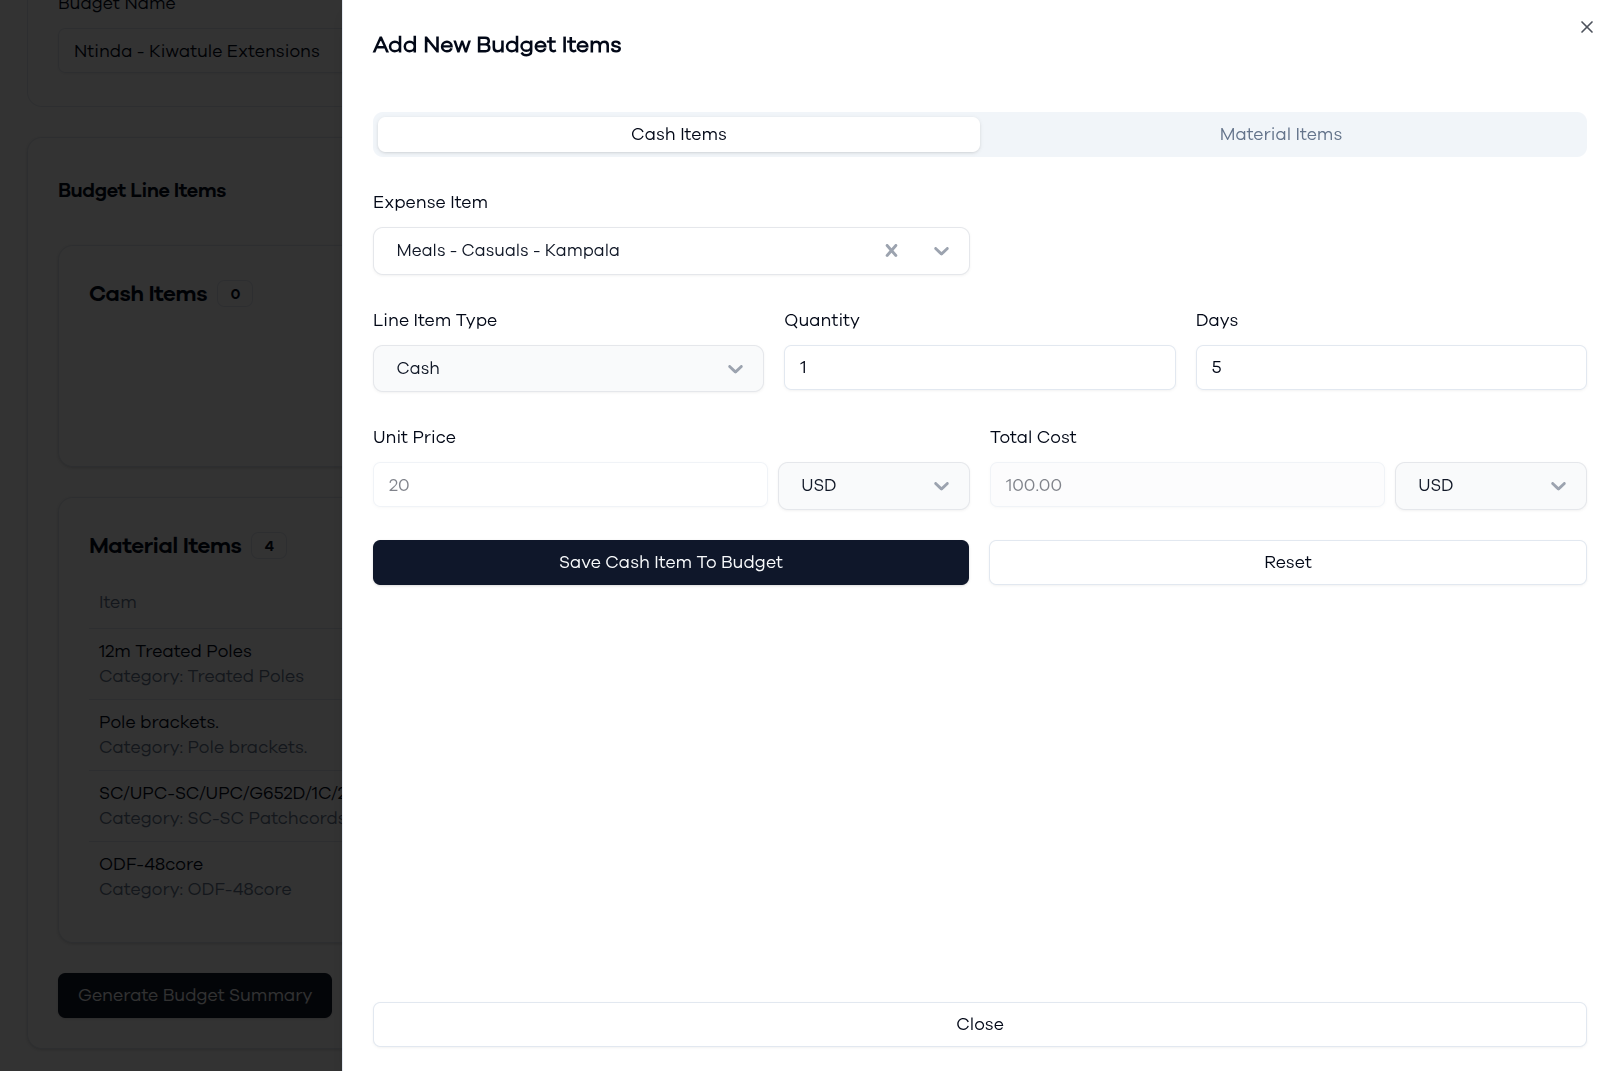
- Click Add Line Item button
- Select the Cash Items tab in the dialog
- Configure the expense item:
- Expense Item: Choose from predefined categories (e.g., "Meals - Casuals - Kampala")
- Line Item Type: Set as "Cash" for expense items
- Quantity: Number of units or occurrences
- Days: Duration for the expense
- Unit Price: Cost per unit/day
- Total Cost: Automatically calculated (Quantity × Days × Unit Price)
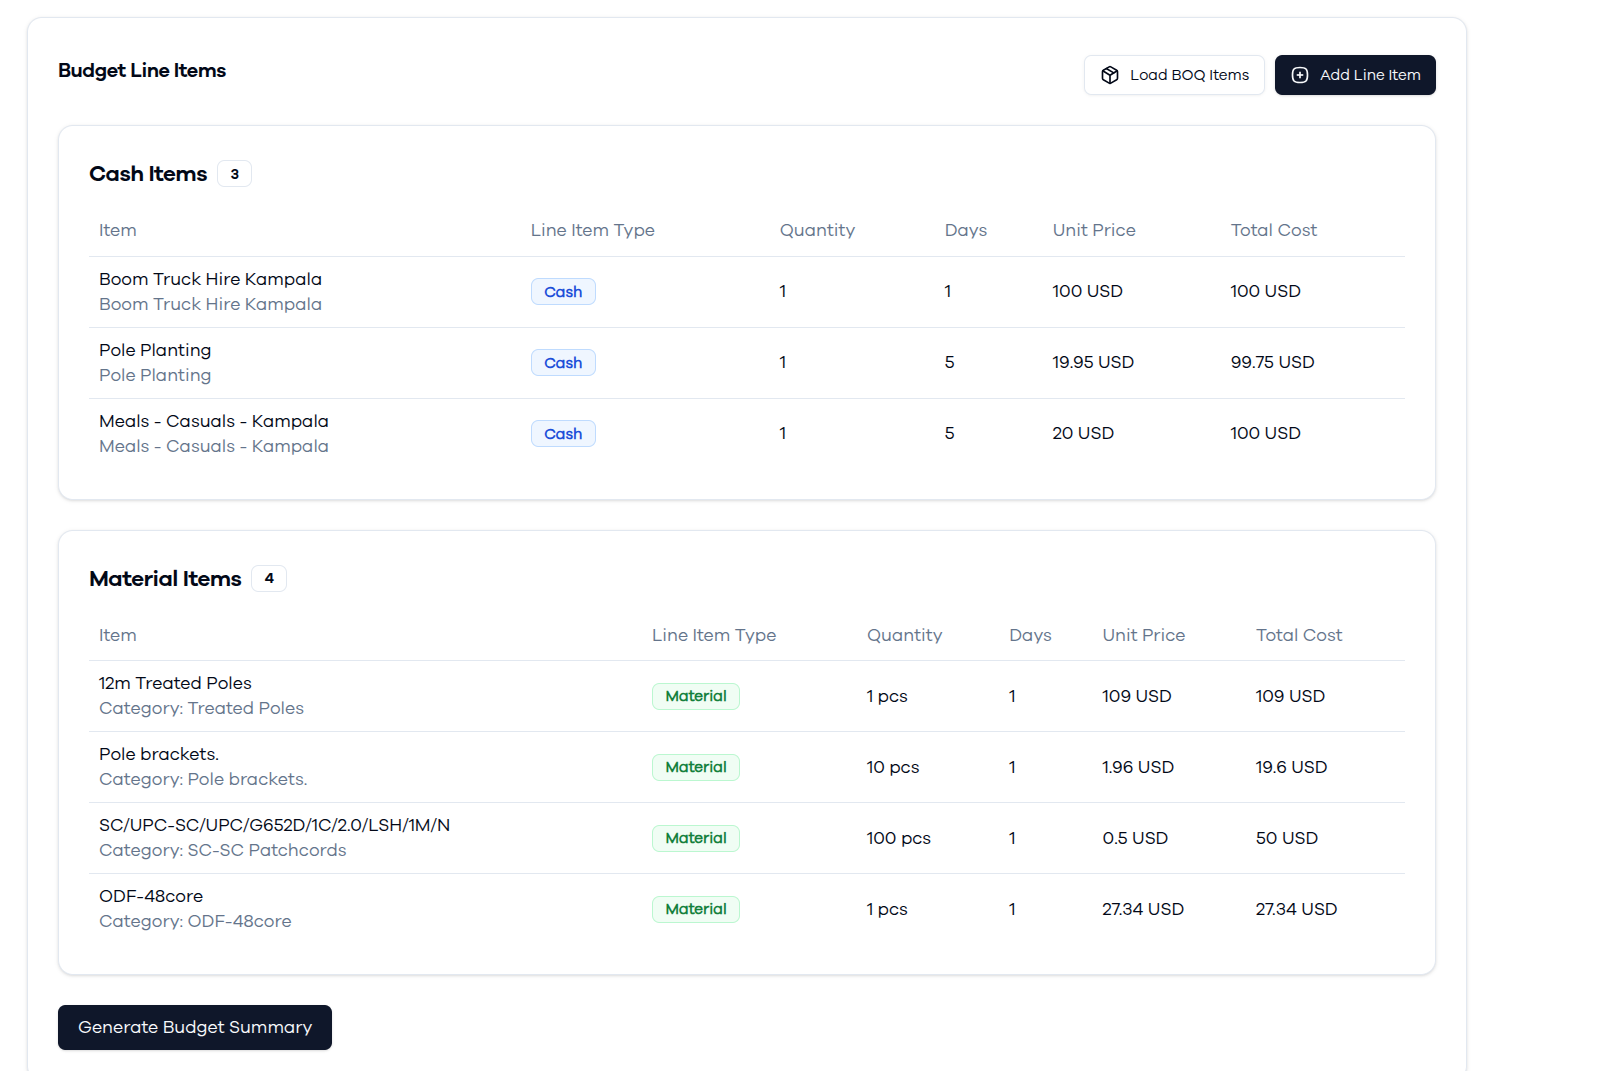
- Review calculated costs in the specified currency (USD)
- Click Save Cash Item To Budget to add the item
3D. Review Cash Items Section
Cash Items Display:
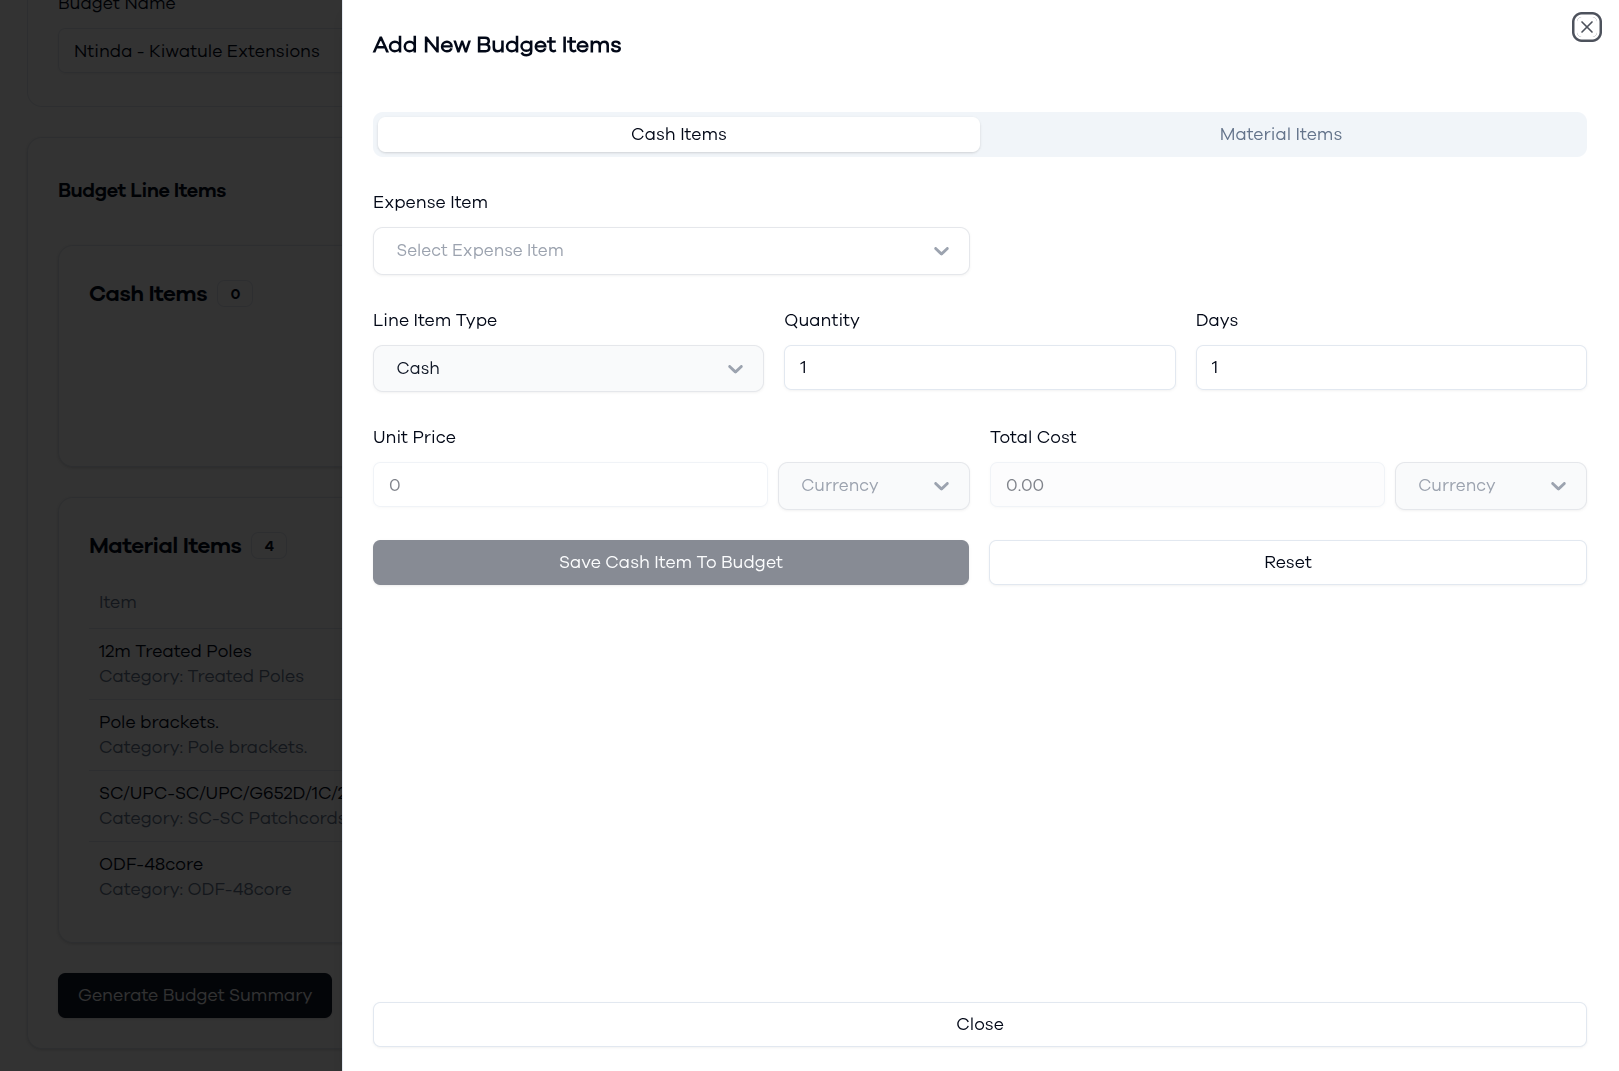
Cash items are displayed in a table format showing:
- Item: Description of the expense
- Line Item Type: Shows "Cash" badge
- Quantity: Number of units
- Days: Duration period
- Unit Price: Cost per unit in currency
- Total Cost: Calculated total expense
Step 4: Budget Summary Generation
Initiating Summary Generation
Once all line items are added:
- Click the Generate Budget Summary button
- System prompts for confirmation with the message: "Are you sure you want to generate the budget summary? This action should be initiated after adding all Line Items."
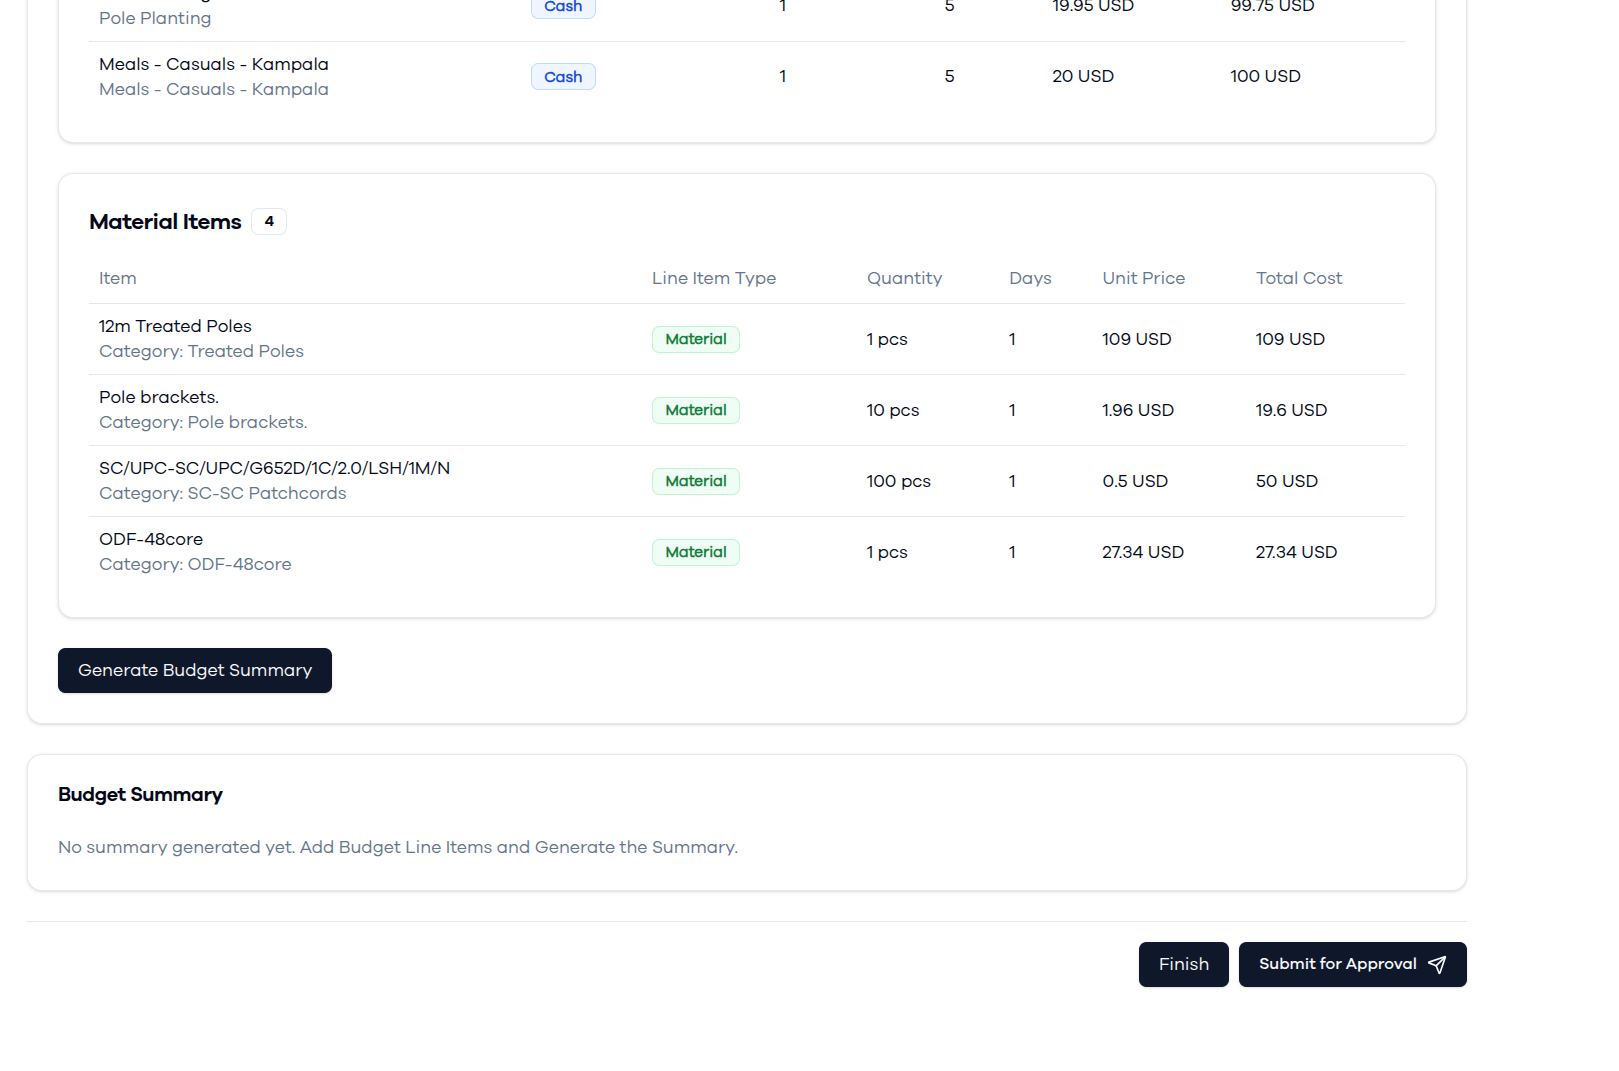
- Click Yes, Generate to proceed with summary creation
- System shows "Generating Budget Summary..." processing indicator
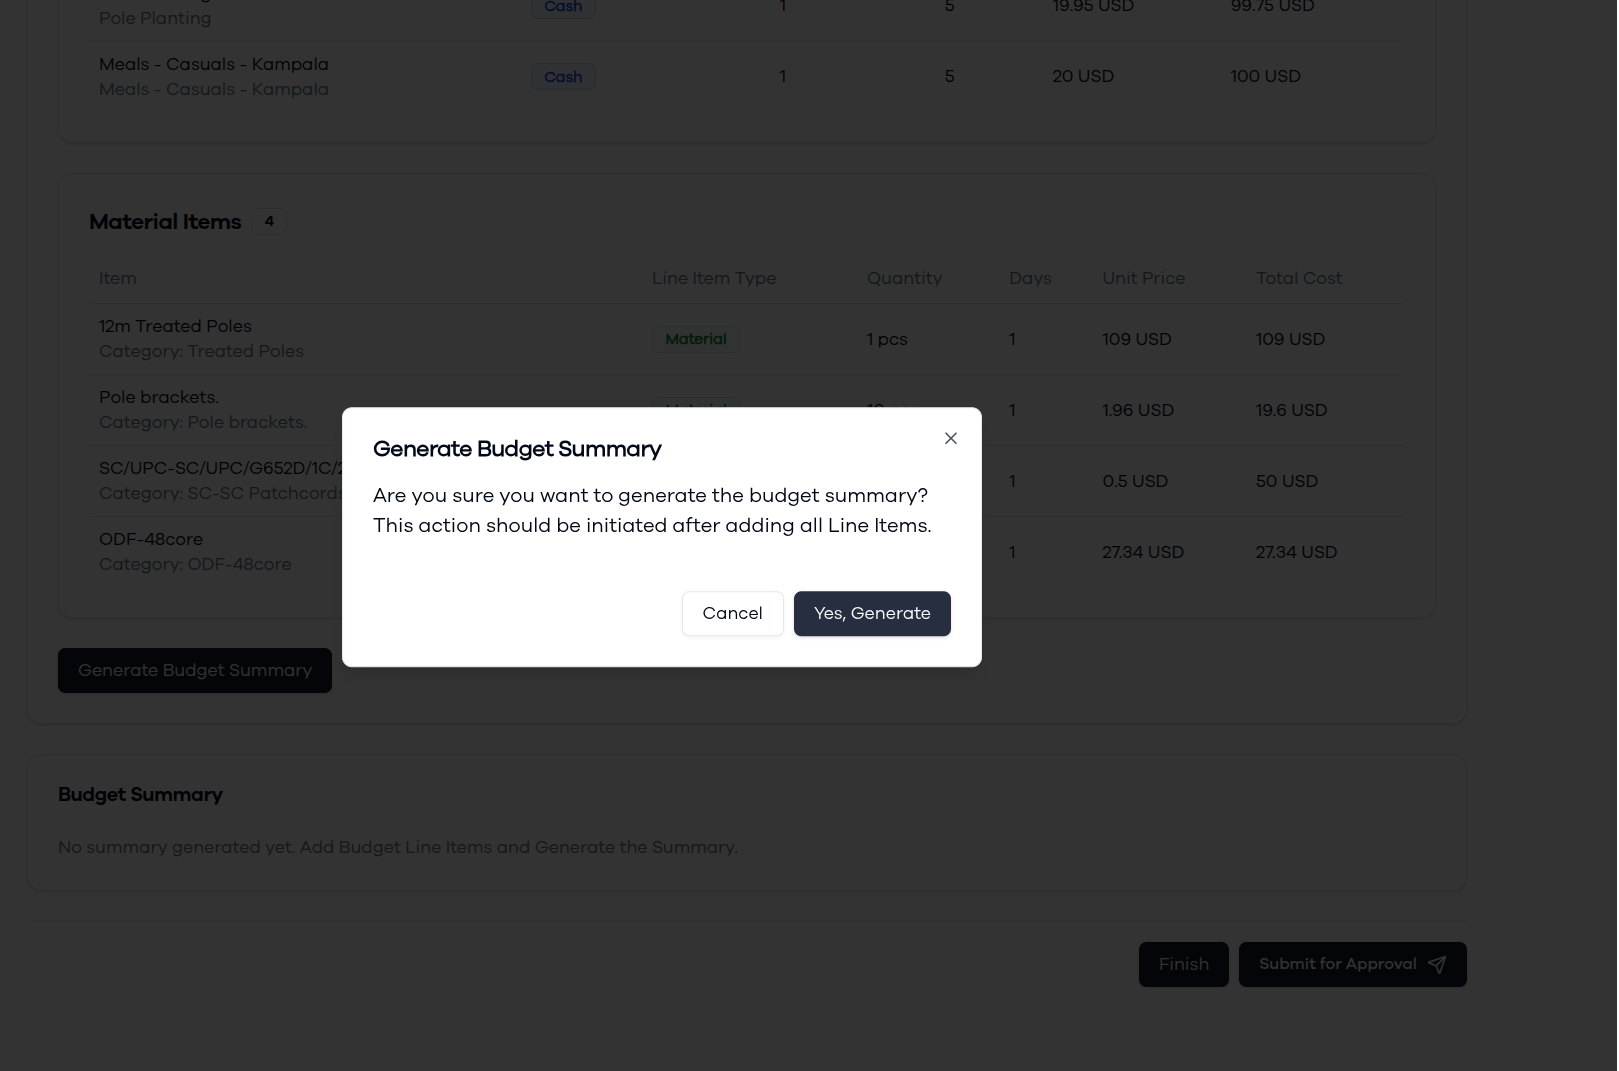
Budget Summary Results
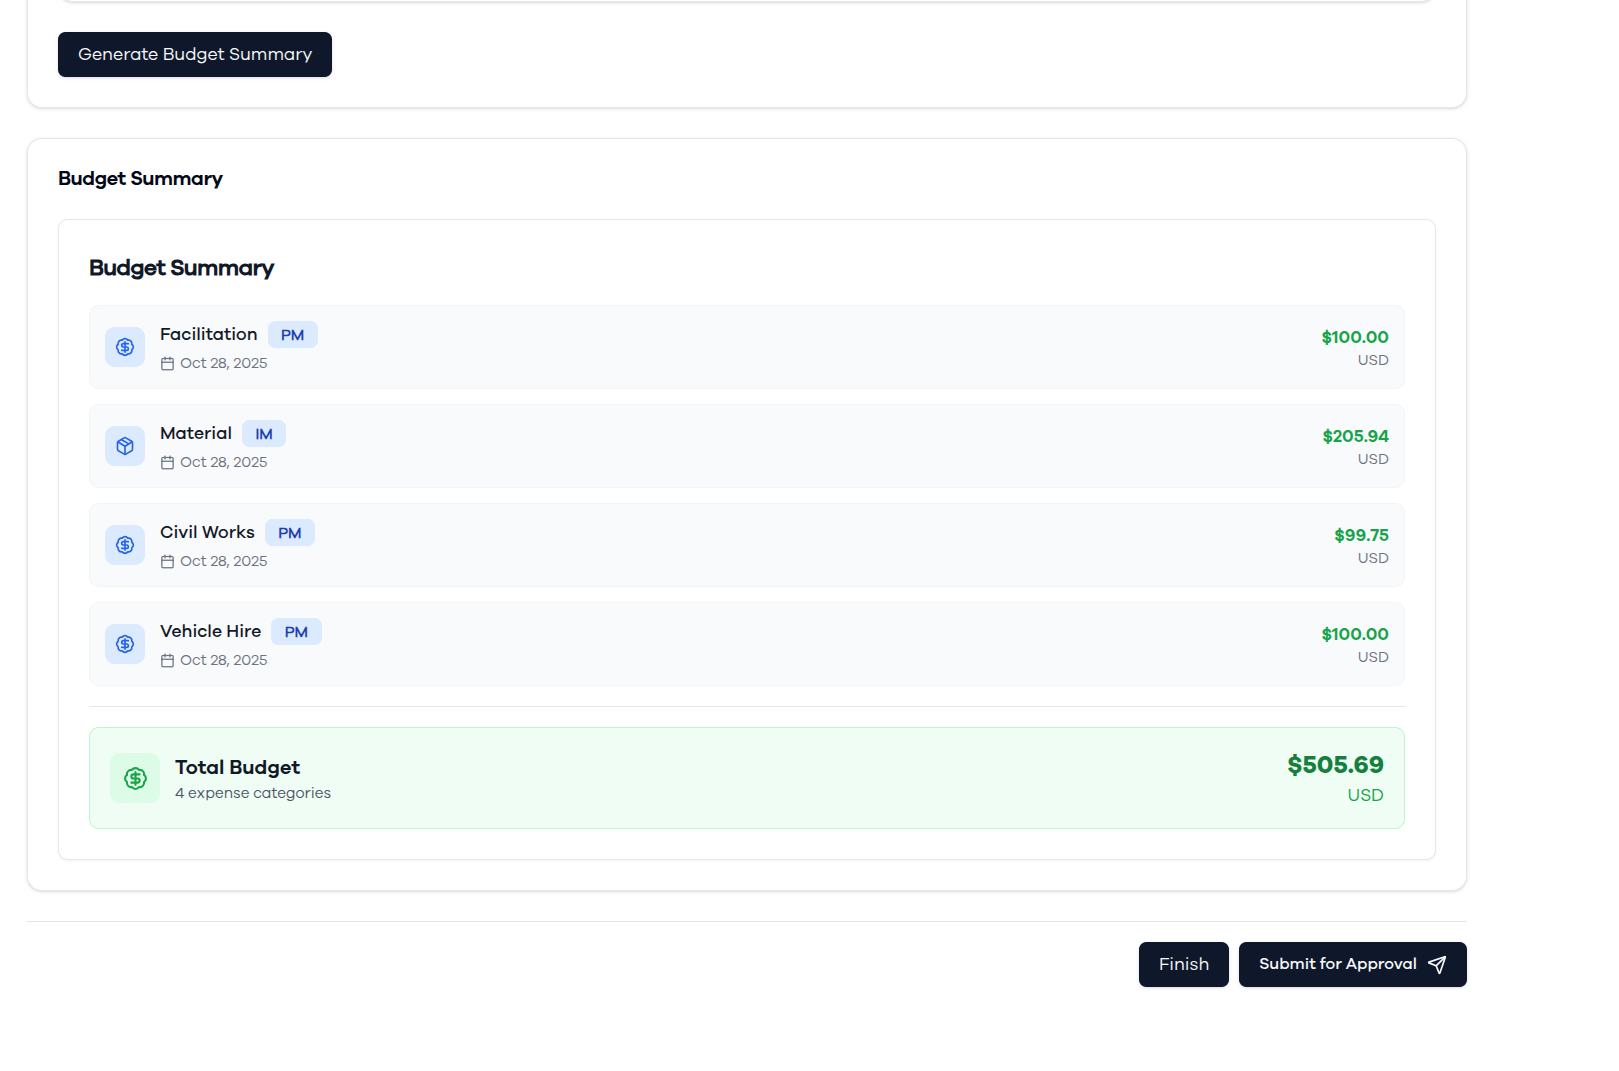
The generated budget summary provides a comprehensive cost breakdown:
Summary Benefits
The budget summary provides:
- Categorized Costs: Clear breakdown by expense type
- Total Project Cost: Complete financial overview for approval
- Currency Standardization: All costs in consistent currency format
Step 5: Project Completion Options
After generating the budget summary, you have two completion choices that determine how your project proceeds:
Option 1: Finish - Project Review Mode
Purpose: Save the project for review and potential modifications before submission for approval
When to Choose "Finish":
- You want to review all project details before submission for approval
- You need to modify details of the project before submission for approval
What Happens After "Finish": 2. Draft Status: Project remains in draft/editable status 3. Project Details Access: You're taken to the project details view 4. Review Capabilities: All project information can be reviewed and modified
Option 2: Submit for Approval - Immediate Submission
Purpose: Immediately submit the project to Line Manager for review and approval
When to Choose "Submit for Approval":
- All project information is verified and complete
- You're confident in the project setup
- Immediate approval processing is desired
Approval Submission Process:
- Submission Dialog: Opens with approver selection and comment fields
- Approver Selection: Choose the appropriate line manager from dropdown
- Submission Comments: Add required context (e.g., "Please Review")
- Final Submission: Click Submit to initiate approval workflow
- Status Change: Project status changes to "Pending Approval"
Integration with Other ERP Modules
Upon Project Approval:
Inventory Management:
- BOQ items feed into Material Resource Plans (MRPs)
- Stock allocation and reservation for approved projects
- Procurement workflows initiated for required materials
Finance Management:
- Approved budgets integrate with expense tracking
- Cash requisition workflows connect to budget categories
- Cost control and variance reporting becomes available