MRP Assignment and Processing Workflow
This section covers the complete workflow for processing Material Resource Plans (MRPs) from warehouse assignment through final reconciliation. The process involves two key roles: Head of Supply Chain who handles assignments, and Warehouse Managers who execute the material handling.
Assign a Warehouse to the MRP (Head of Supply Chain)
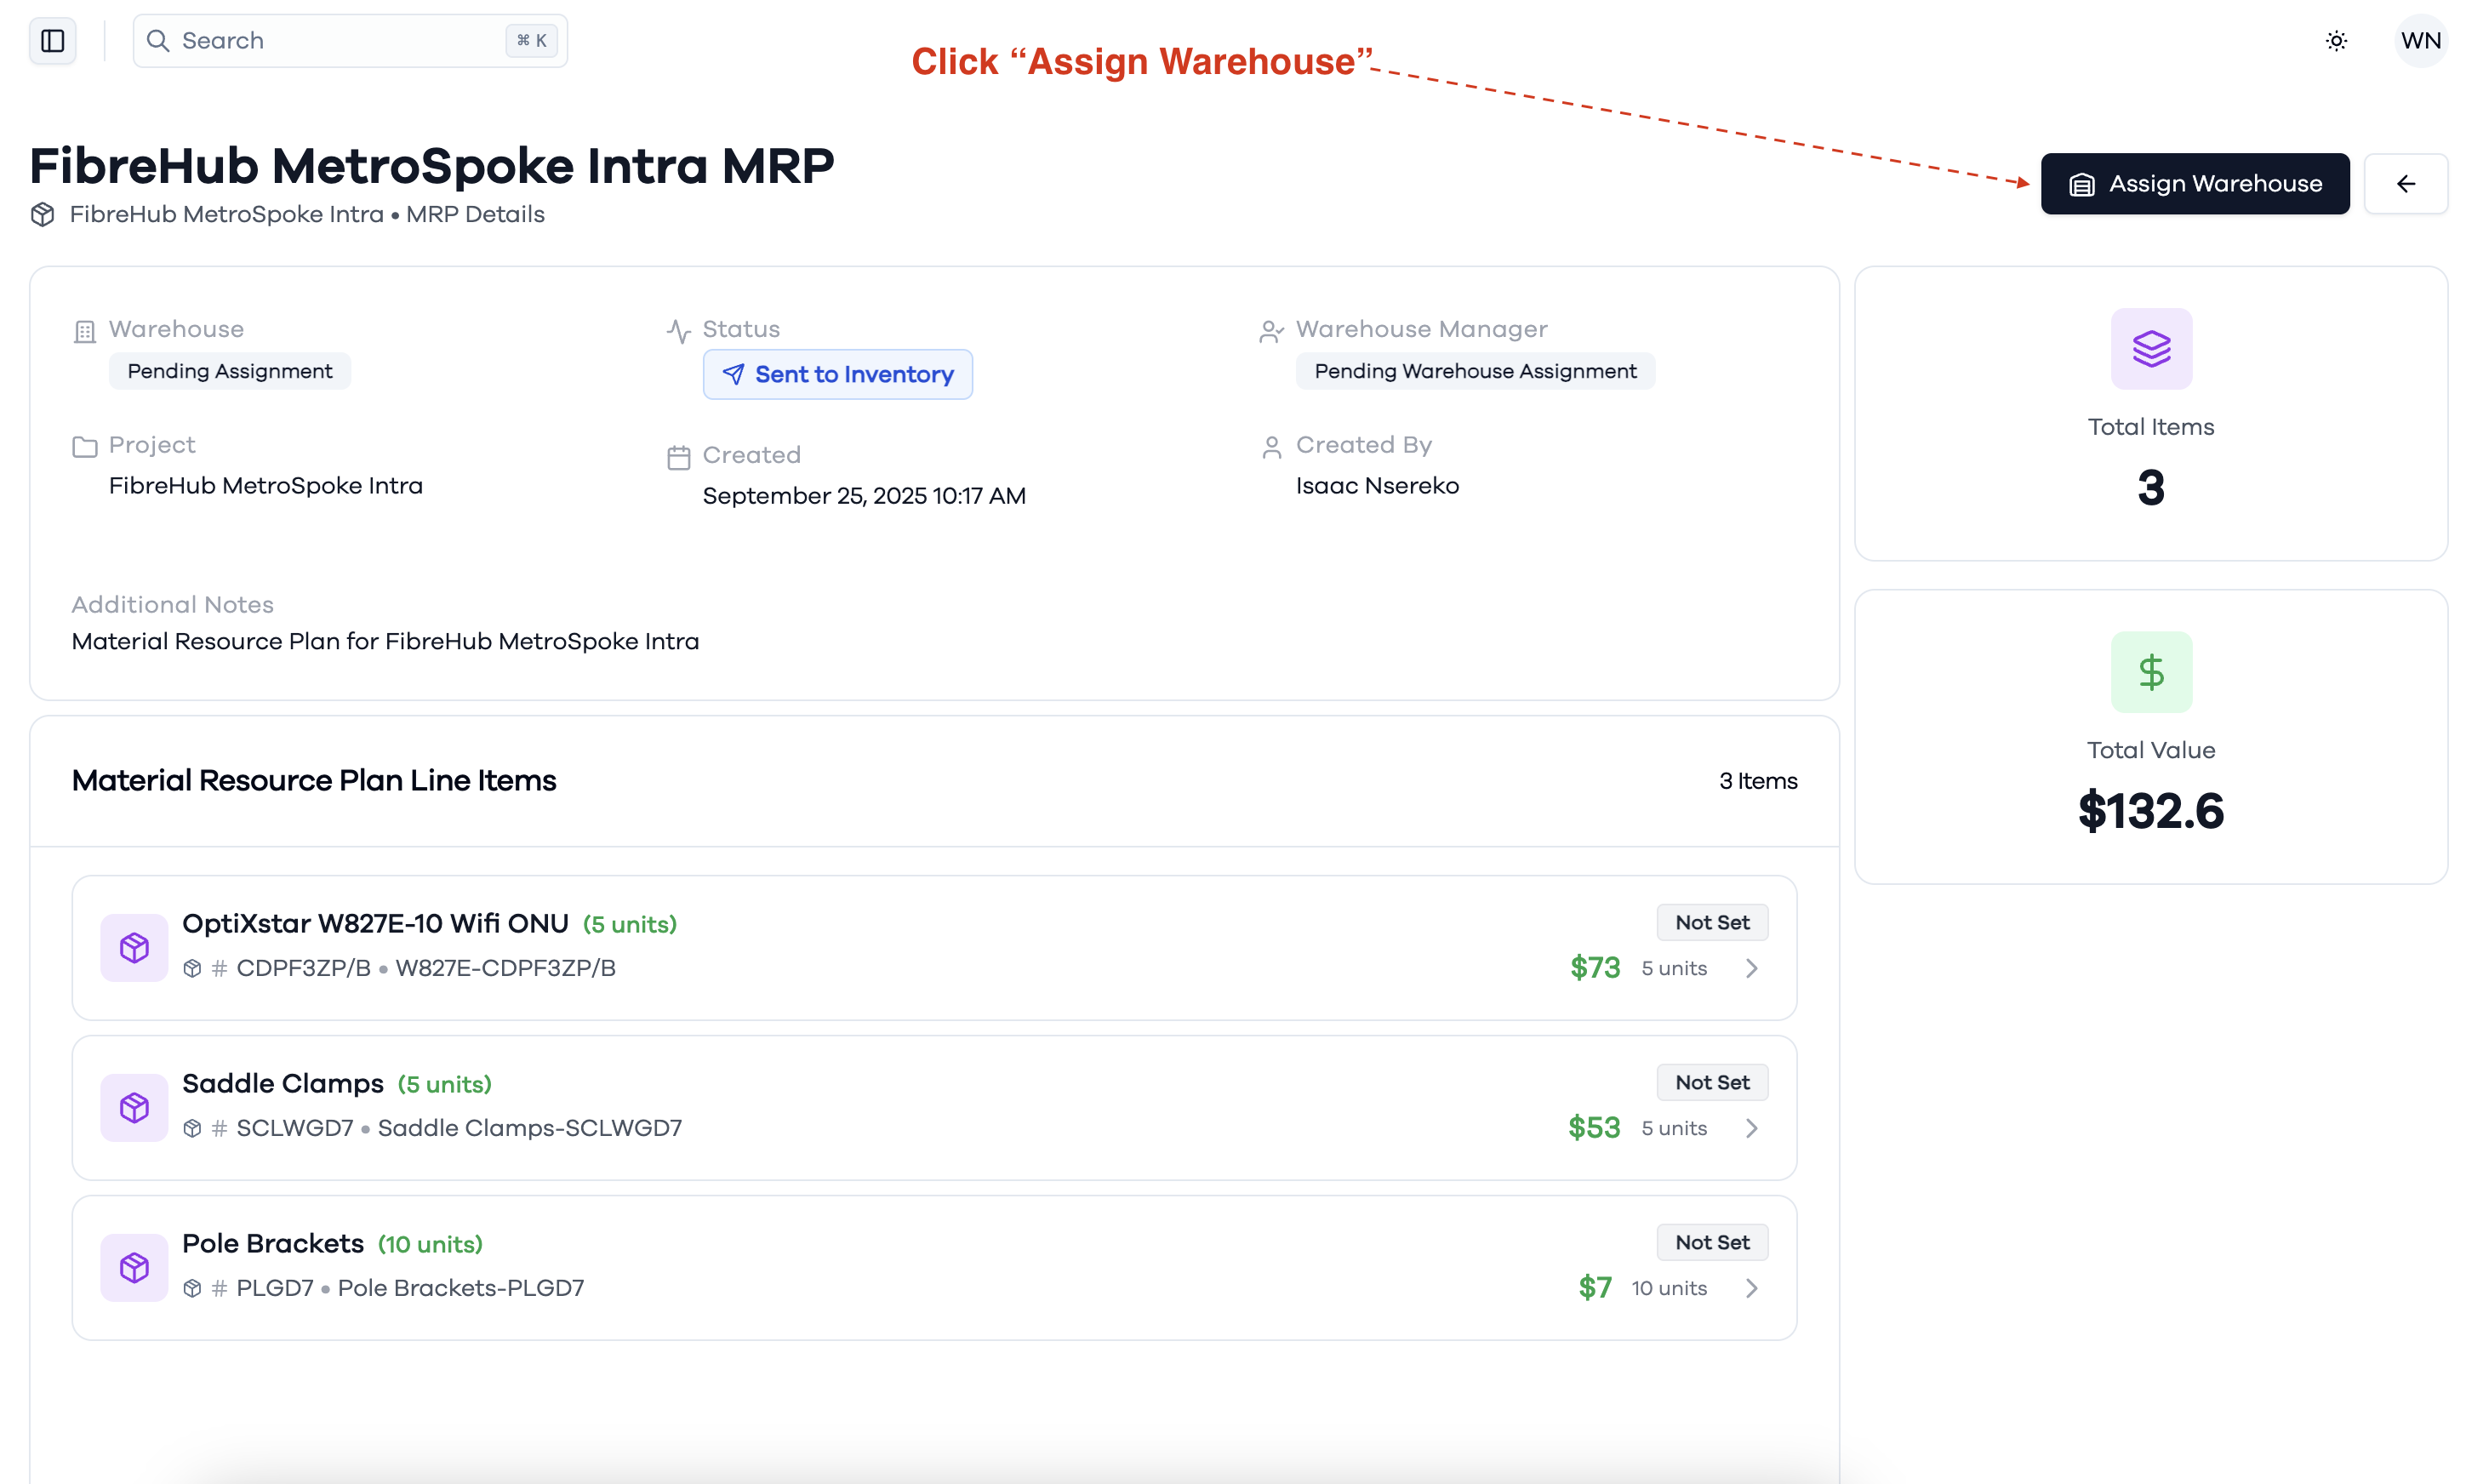
When an MRP is in the "Sent to Inventory" status and pending assignment, the Head of Supply Chain is responsible for assigning it to an appropriate warehouse:
- Head of Supply Chain reviews the MRP requirements and available warehouse capacity
- Opens the MRP details page from the "Pending Assignment" section
- Clicks the Assign Warehouse button at the top right of the page
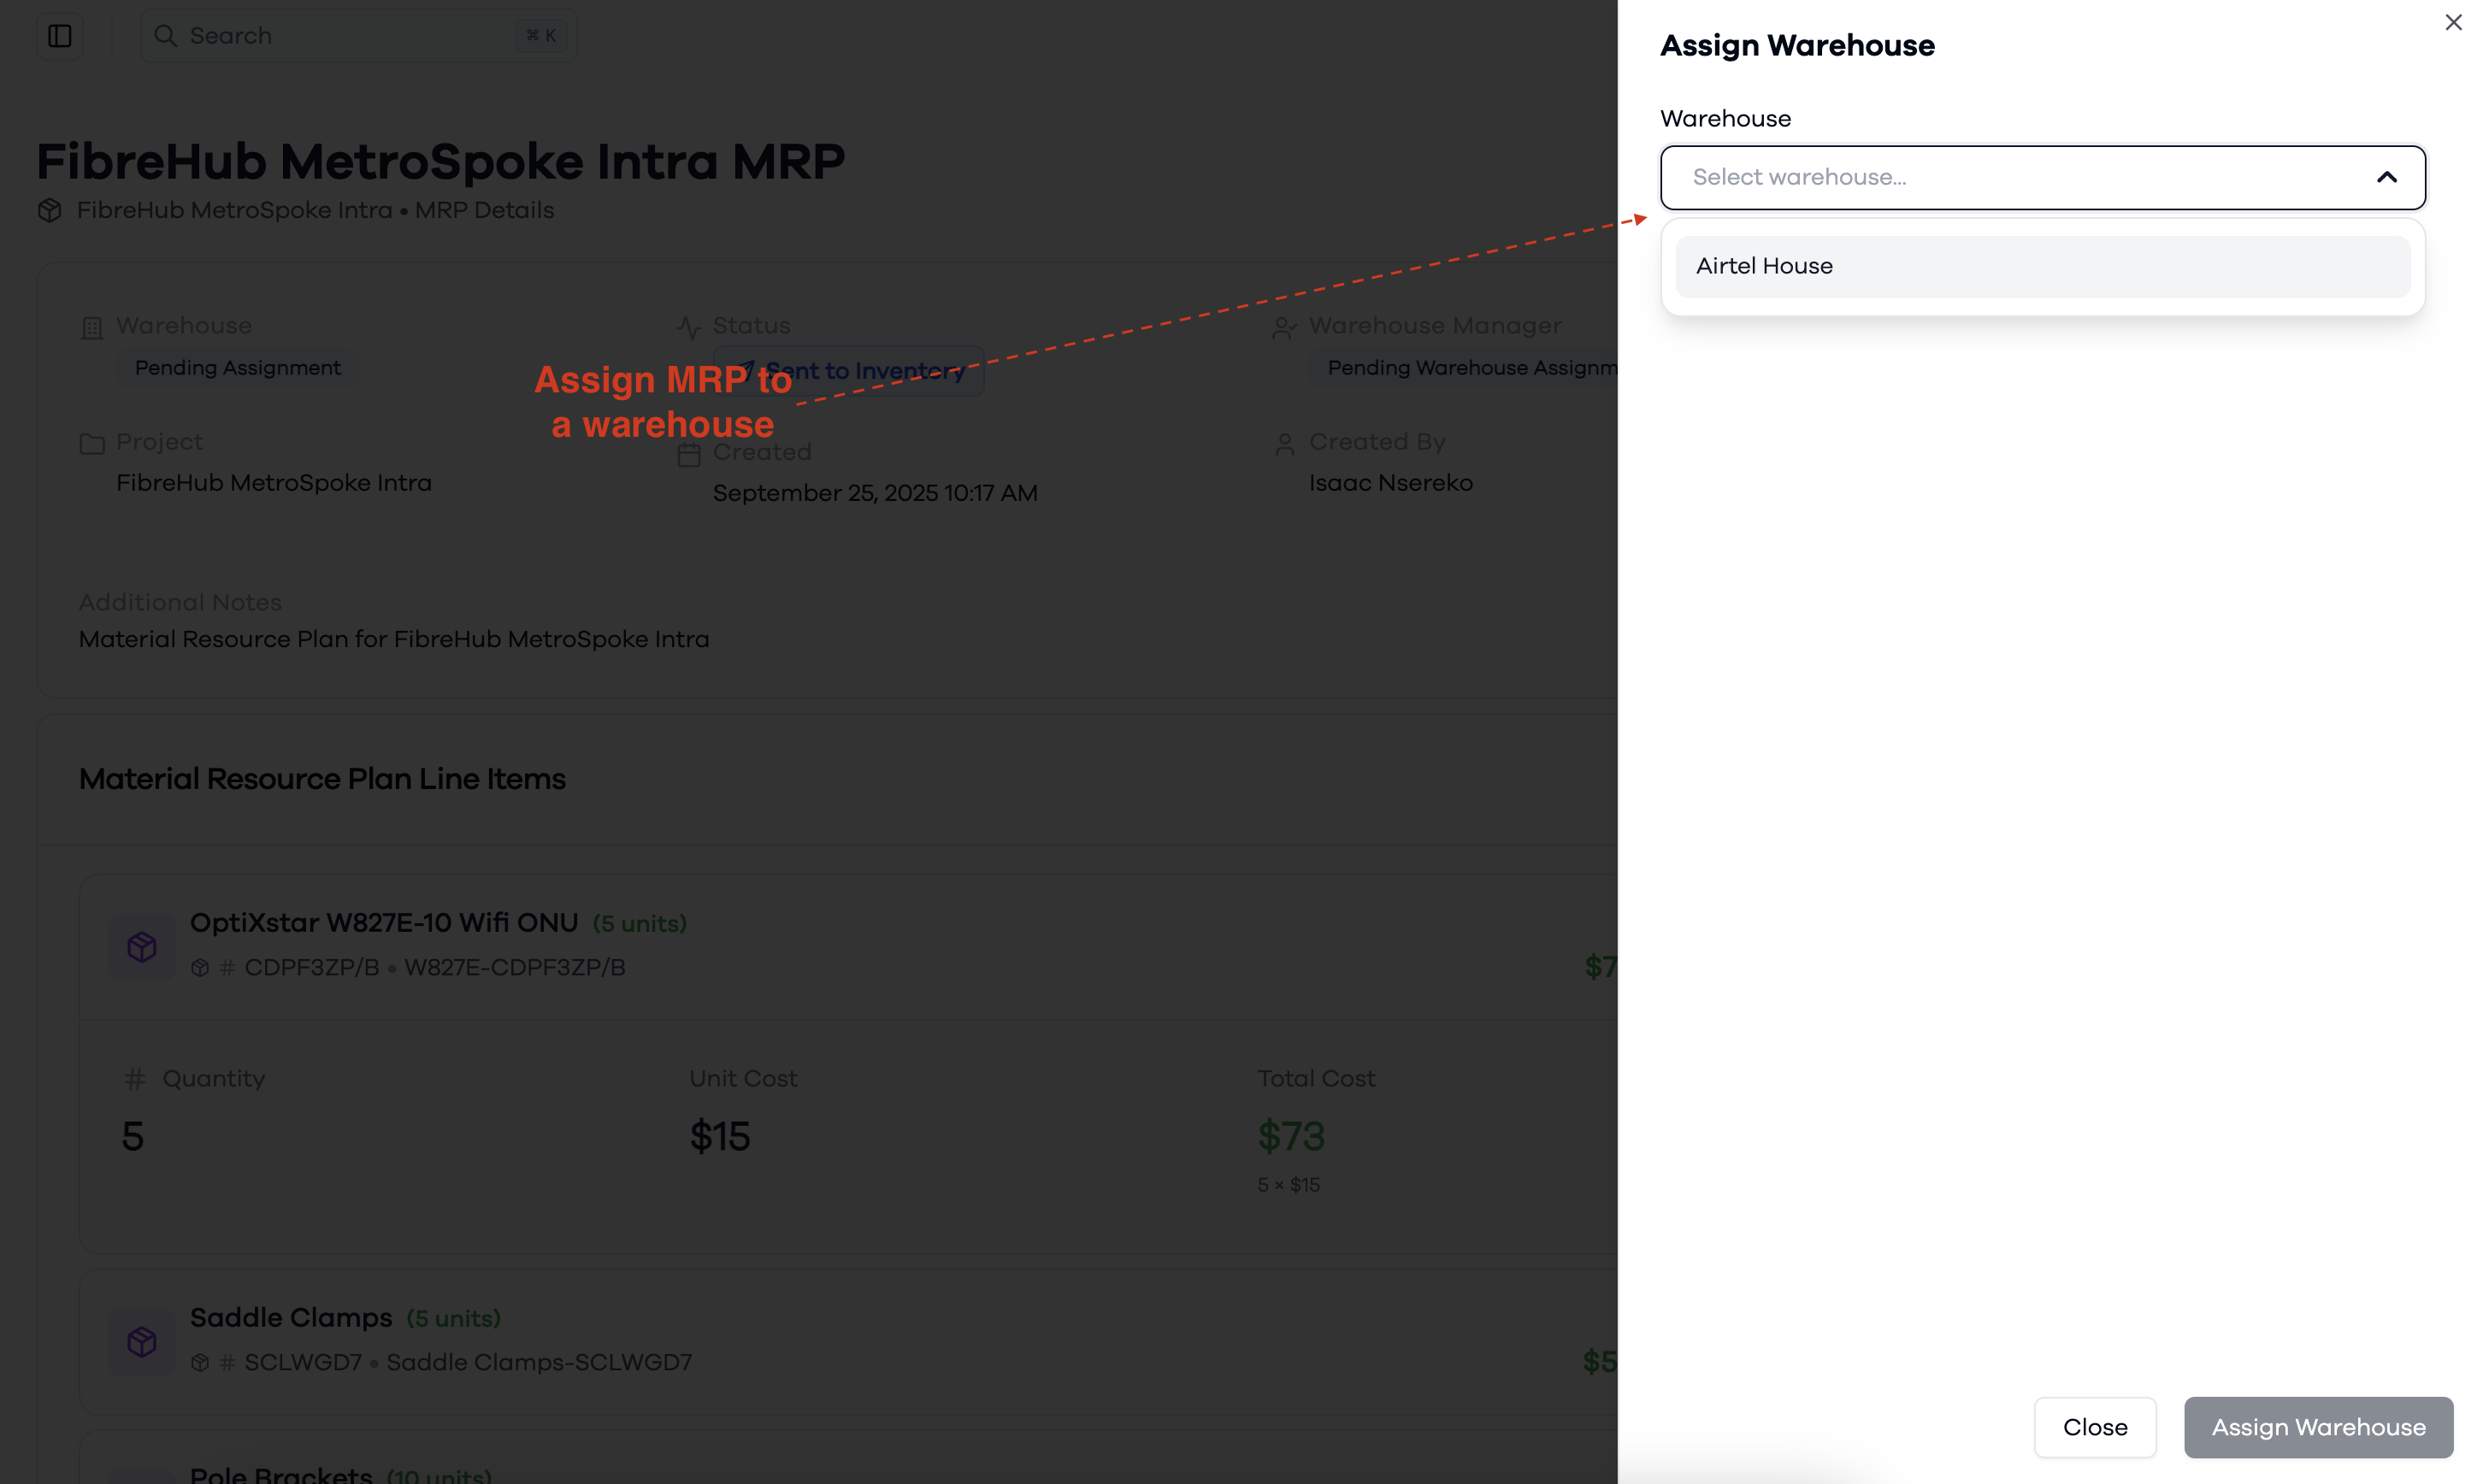
- Selects the appropriate warehouse based on material requirements, location, and capacity
Once assigned, the system automatically sends a notification to the designated warehouse manager informing them of the new MRP assignment. This assignment is required before any further processing can occur.
Warehouse Manager Workflow
Once the Head of Supply Chain assigns an MRP to a warehouse, the warehouse manager receives a notification and can proceed with the following steps to process the MRP.
Confirm MRP Receipt (Warehouse Manager)
After receiving notification of the MRP assignment, the warehouse manager should:
- Navigate to the Material Resource Plans section and locate the assigned MRP
- Open the MRP details page to review the assignment
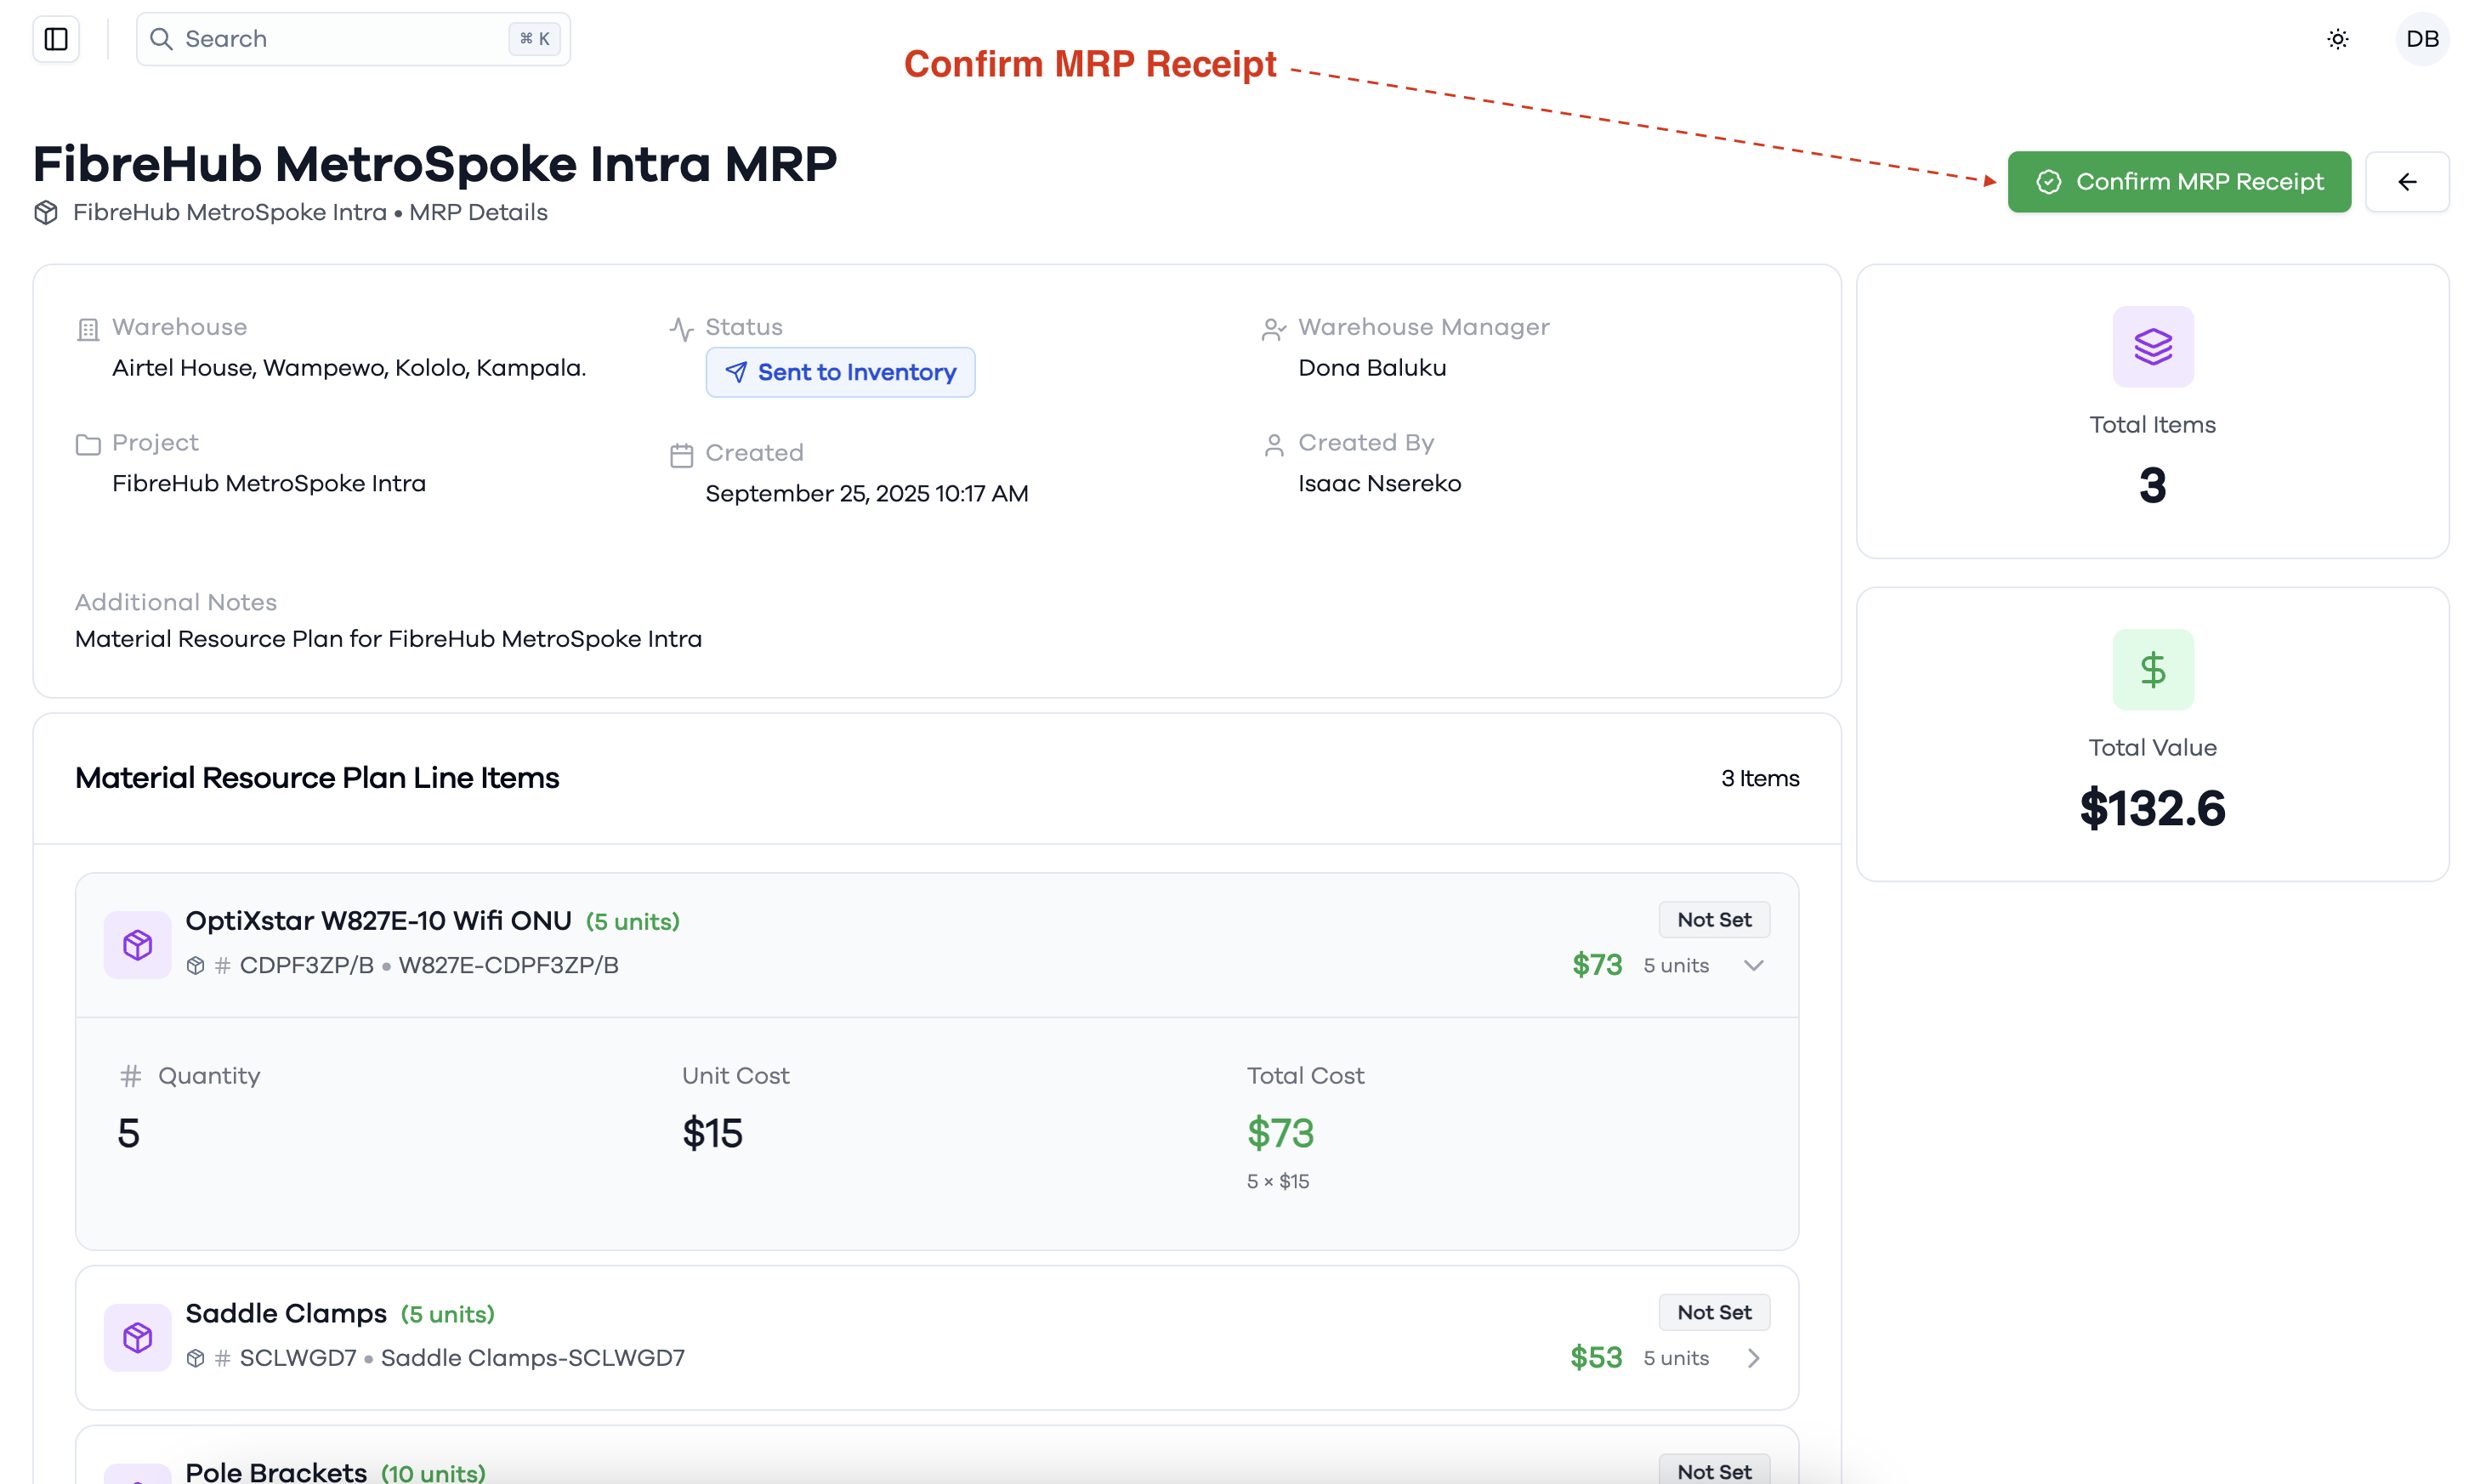
- Review the assigned warehouse, warehouse manager, and line items
- Click the Confirm MRP Receipt button at the top right to acknowledge receipt
This step updates the MRP status from "Sent to Inventory" to "Received by Inventory" and confirms that the warehouse has accepted responsibility for processing the MRP.
Set MRP Line Item Availability (Warehouse Manager)
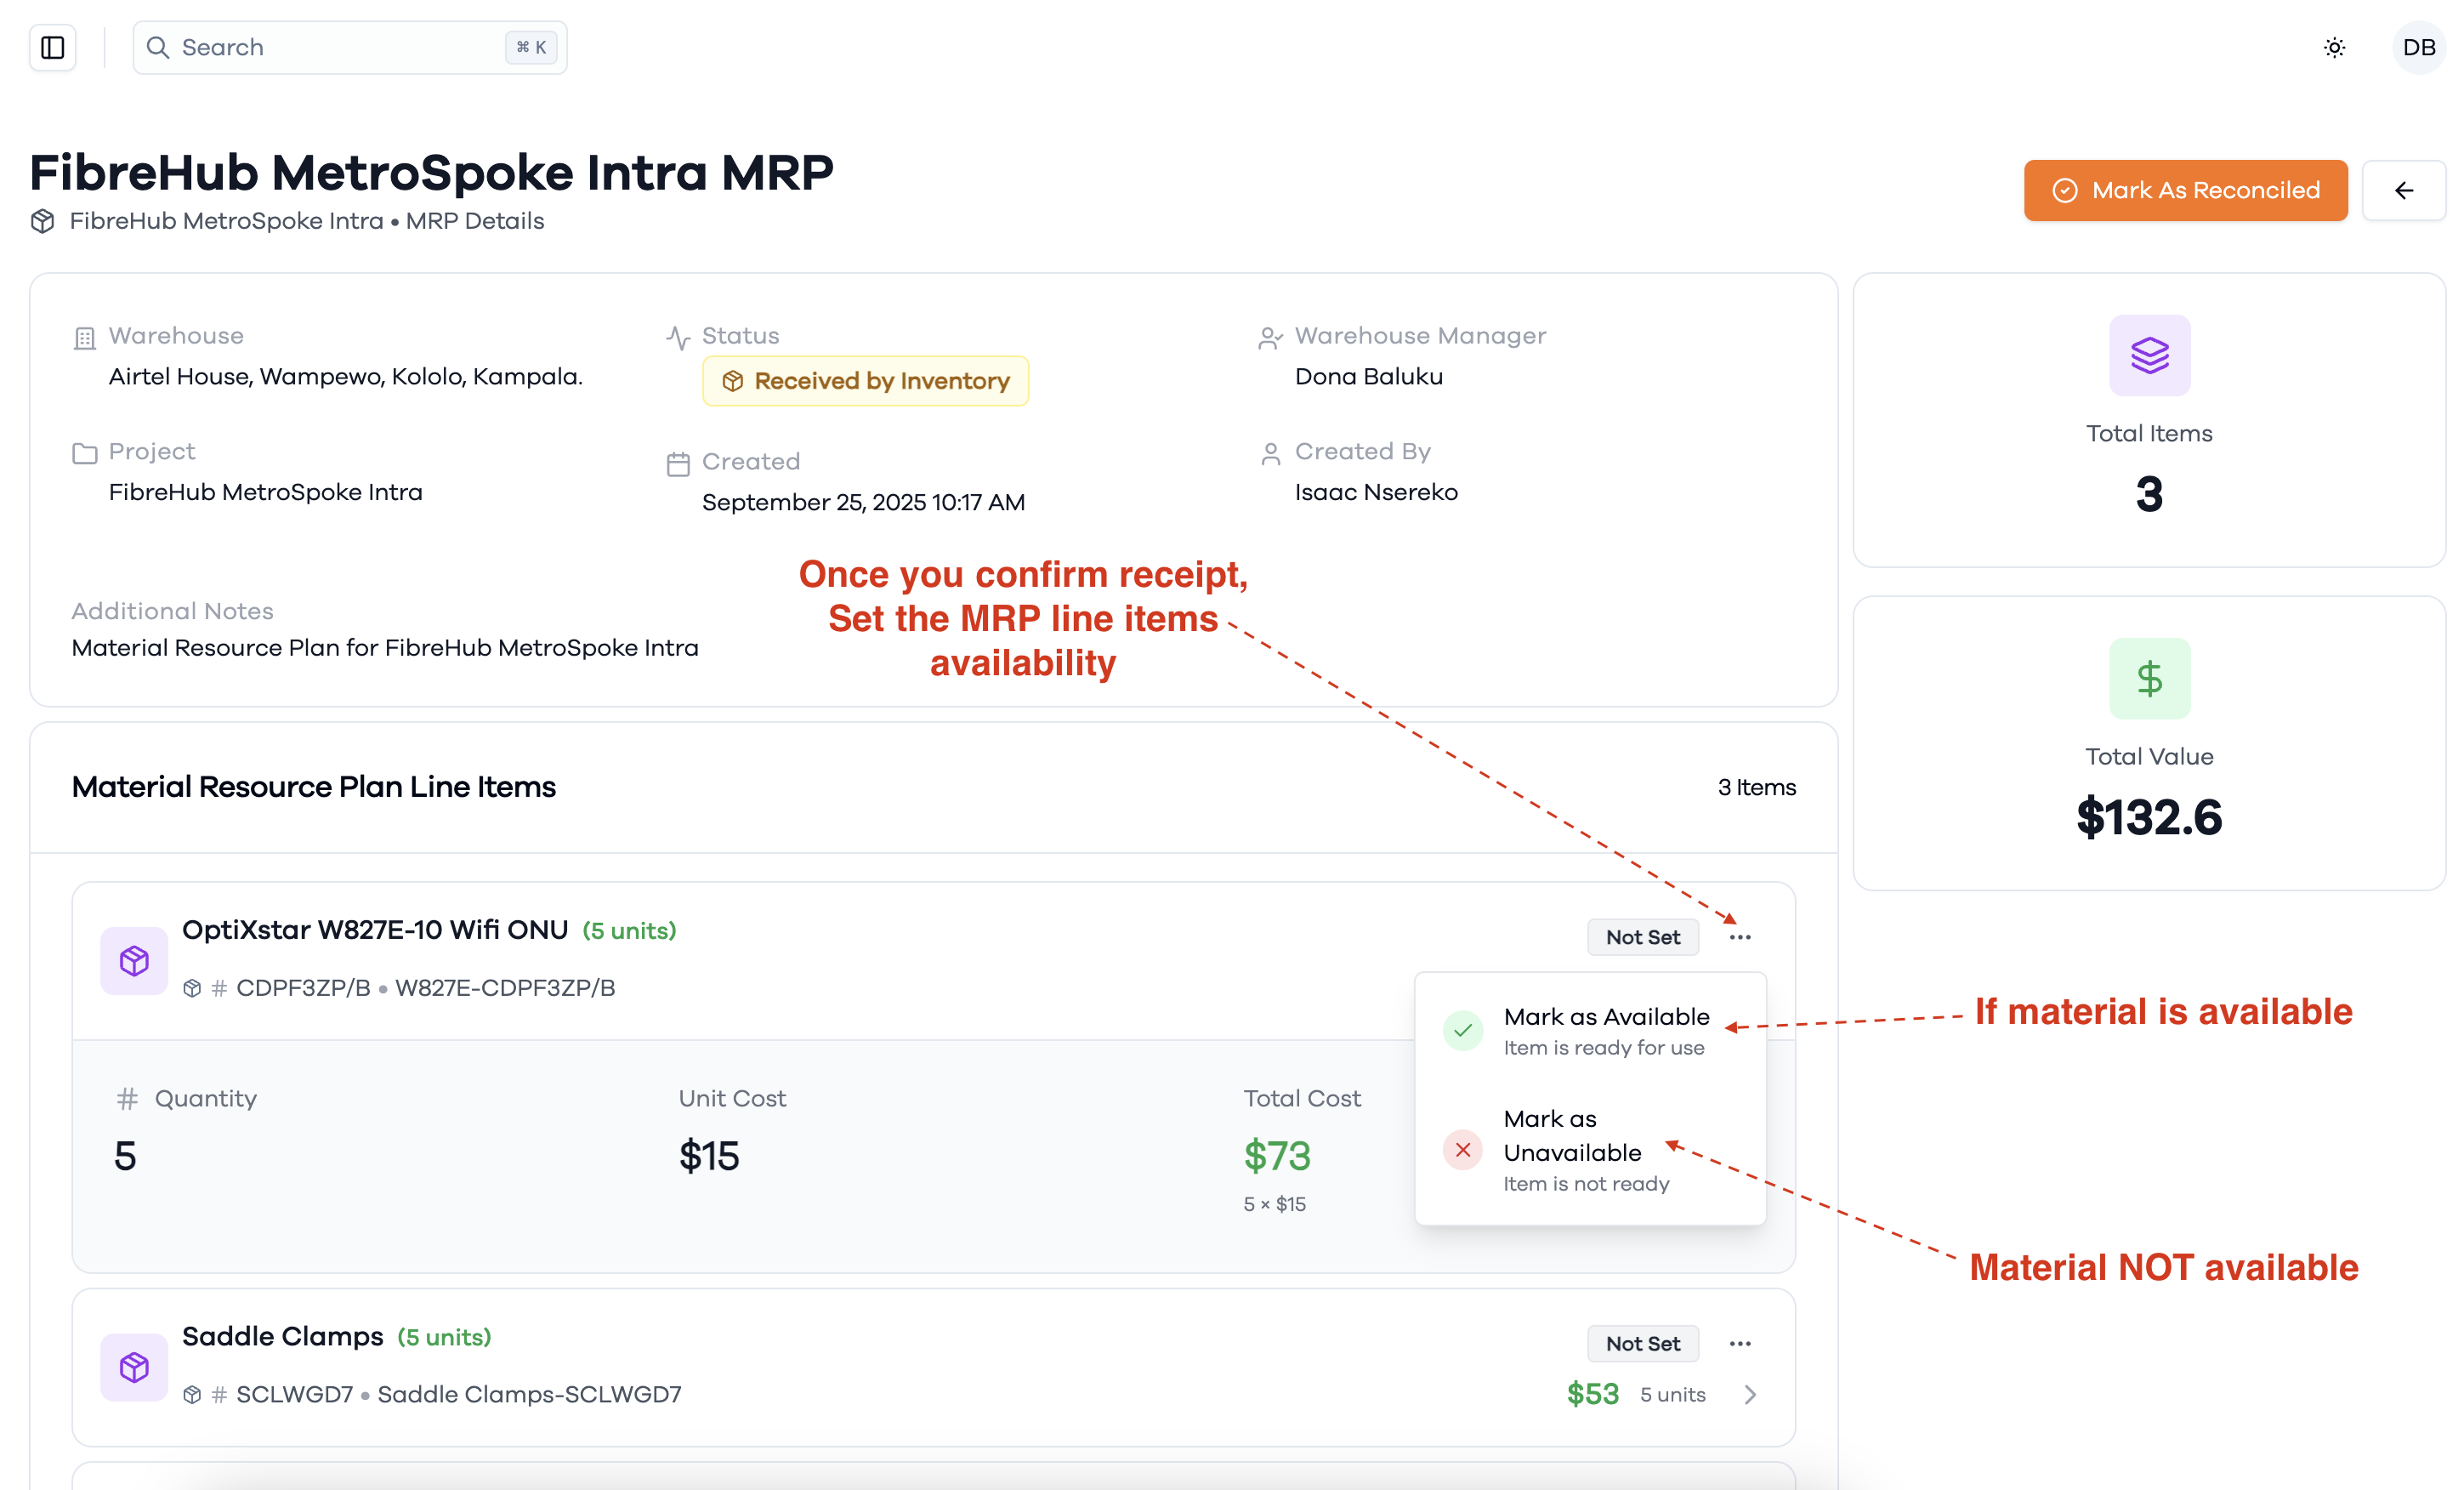
After confirming MRP receipt, the warehouse manager proceeds to check material availability:
- For each line item in the Material Resource Plan, click the Not Set button (three dots) next to the item.
- Choose Mark as Available if the material is ready for use, or Mark as Unavailable if the item is not ready.
Setting the availability status ensures accurate tracking of which materials are ready for allocation or use.
Reserve Material (Warehouse Manager)
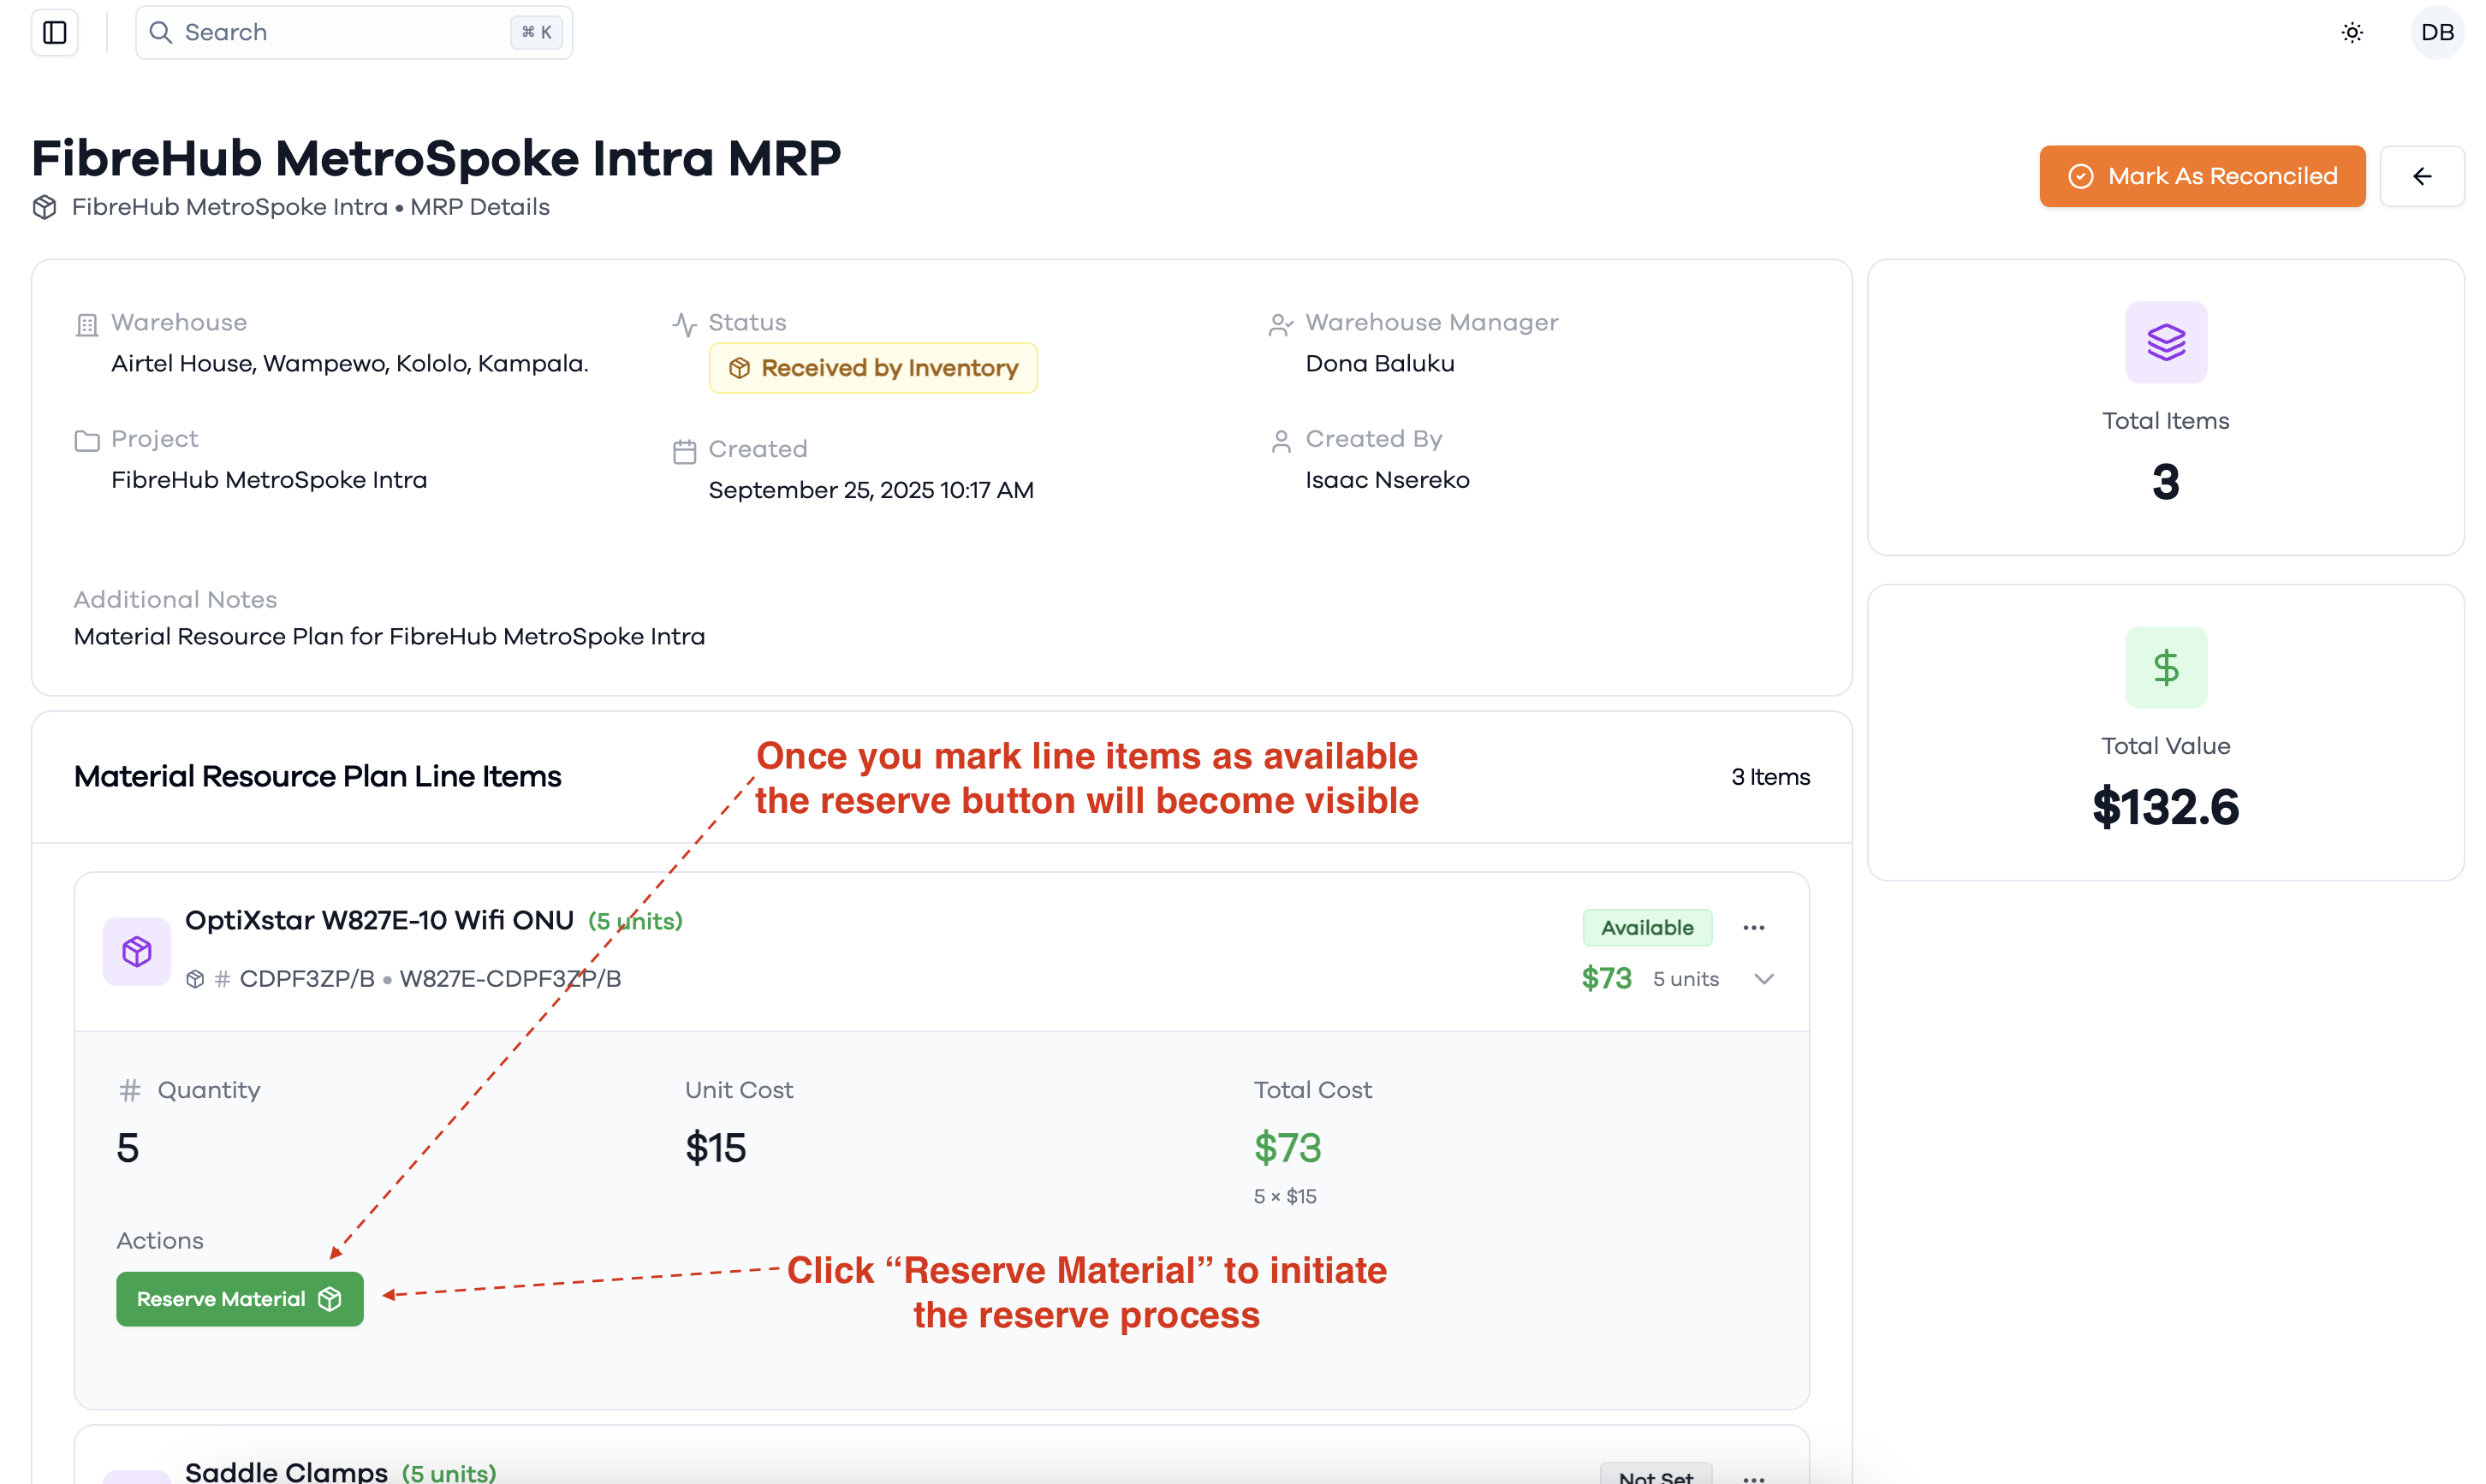
After marking line items as available, the warehouse manager can reserve materials:
- The Reserve Material button will appear next to each available item.
- Click Reserve Material to initiate the reservation process for that material.
This step ensures that the required materials are set aside and reserved for the intended project or use.
Specify Quantity to Reserve (Warehouse Manager)
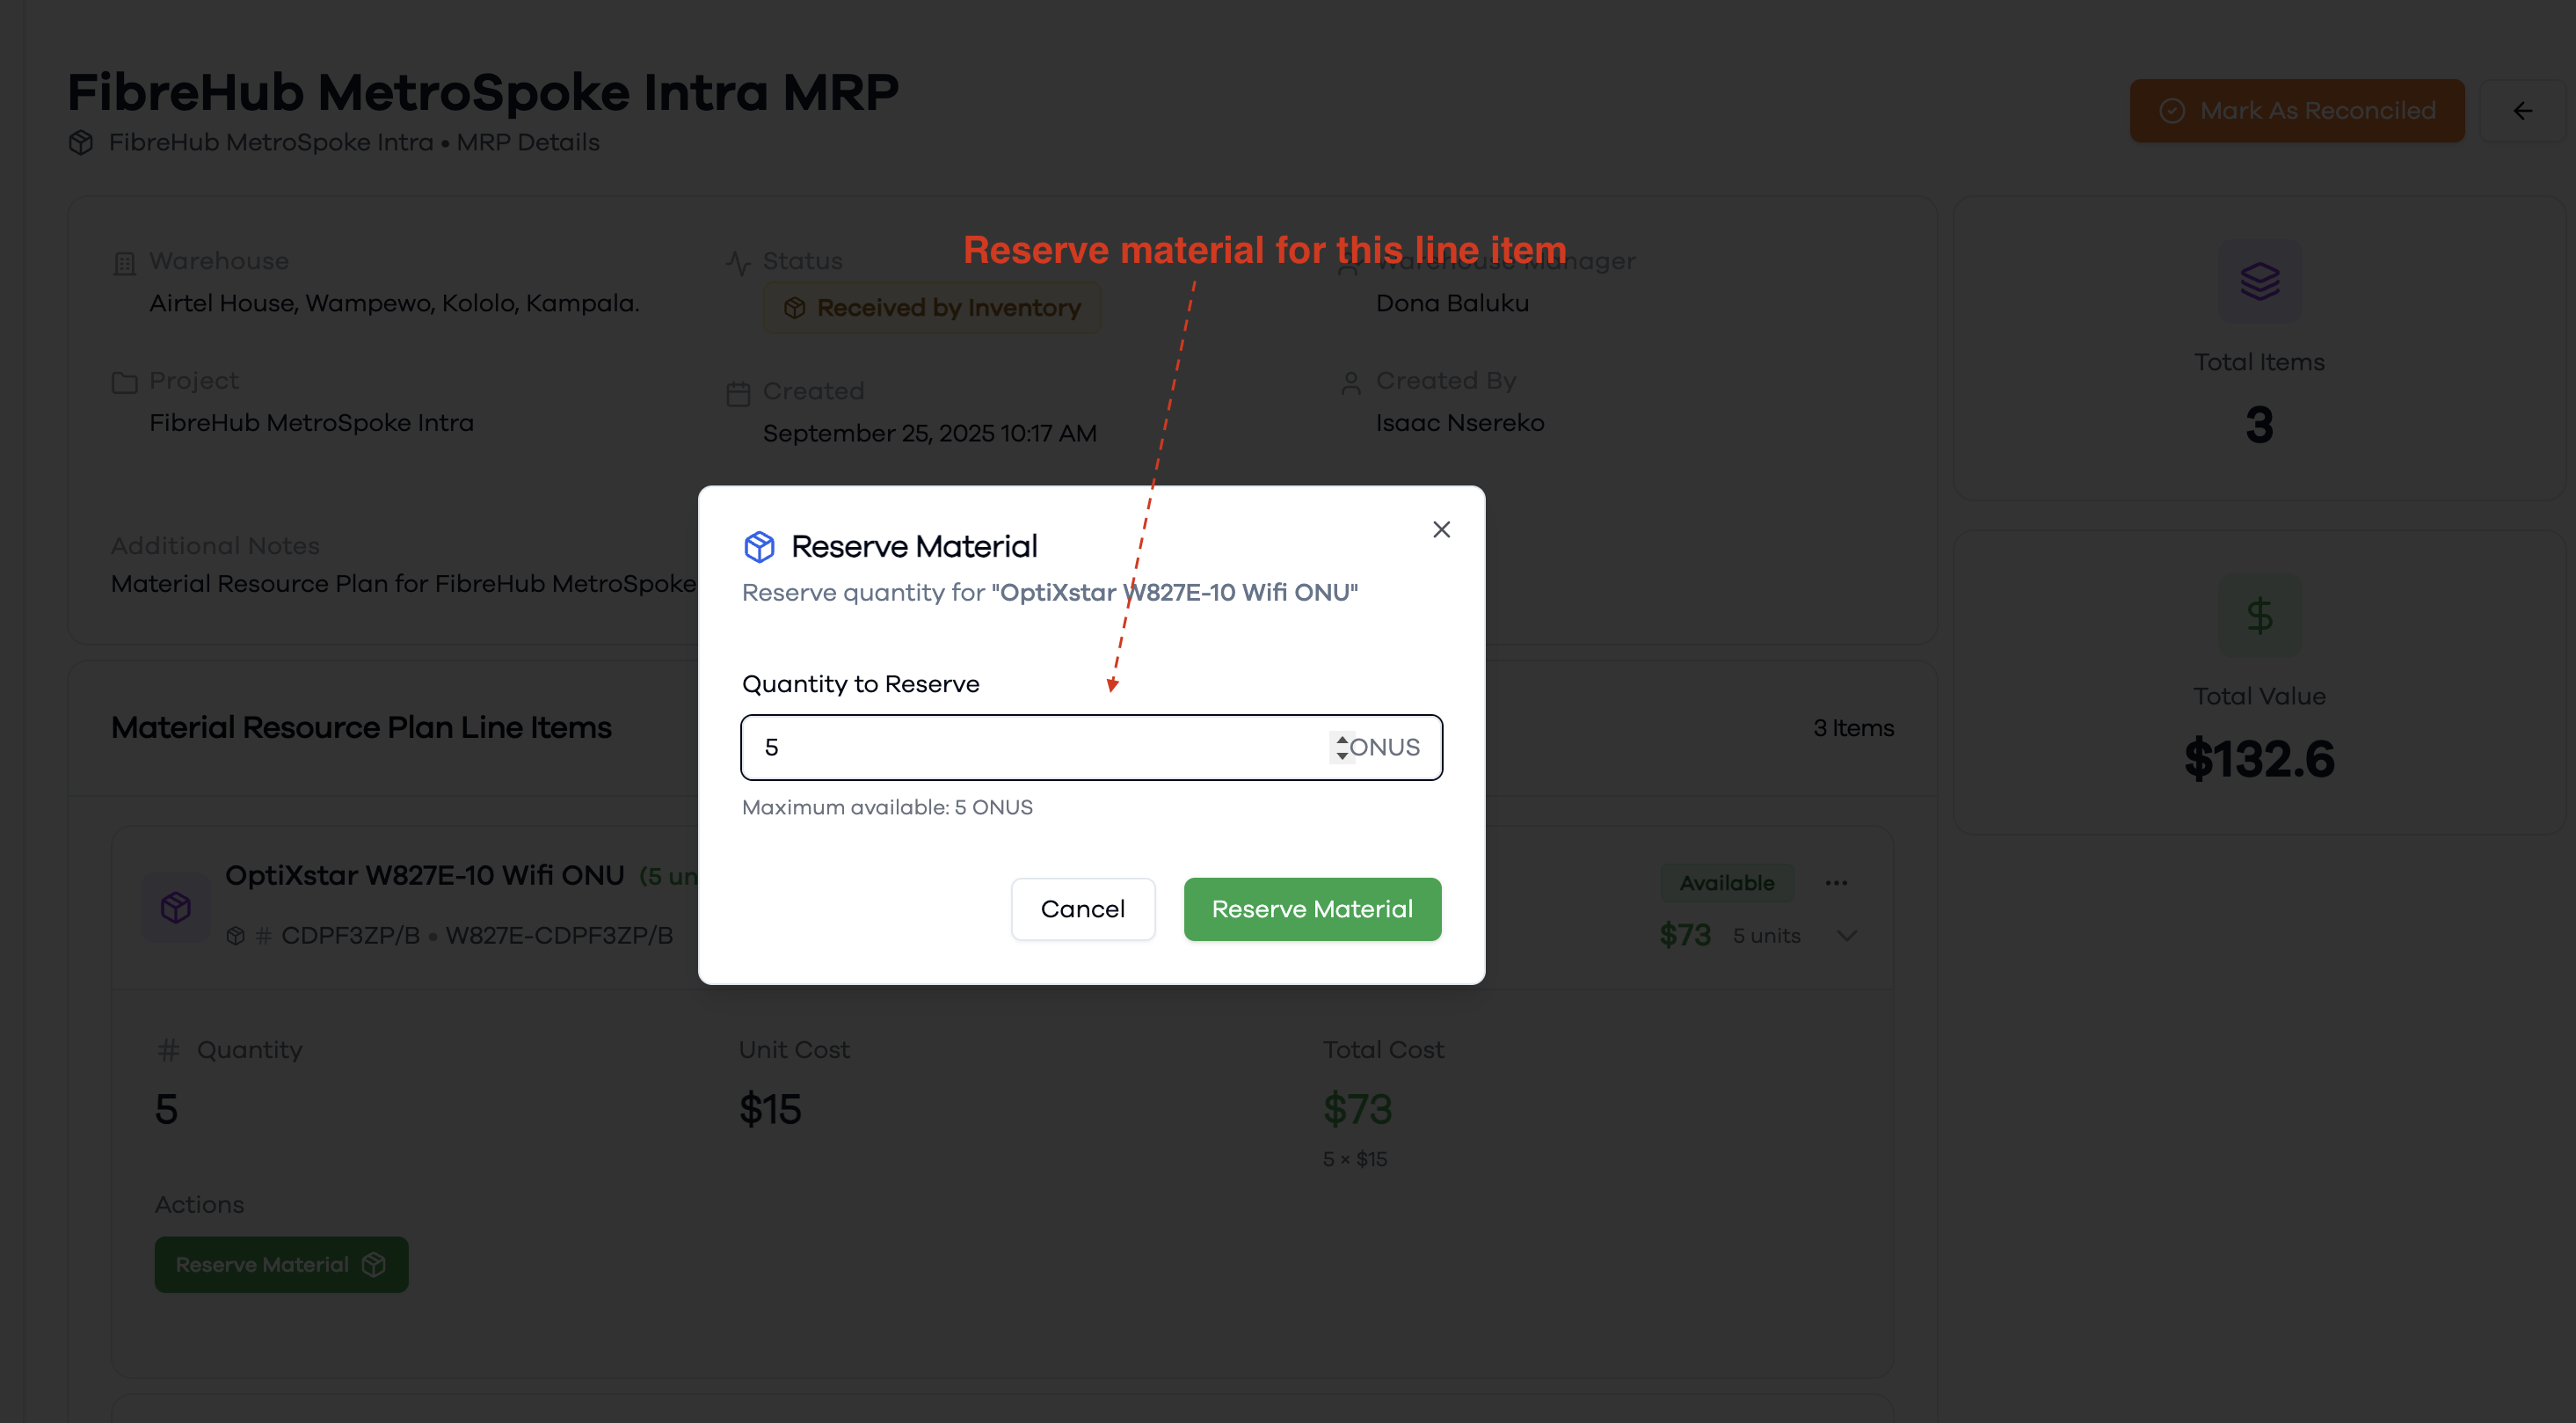
When reserving material for a line item, the warehouse manager specifies the exact quantity:
- A dialog will appear prompting you to enter the Quantity to Reserve for the selected item.
- Enter the desired quantity, up to the maximum available for that item.
- Click Reserve Material to confirm and reserve the specified quantity.
This ensures that the correct amount of material is set aside for the project.
Mark MRP as Reconciled (Warehouse Manager)
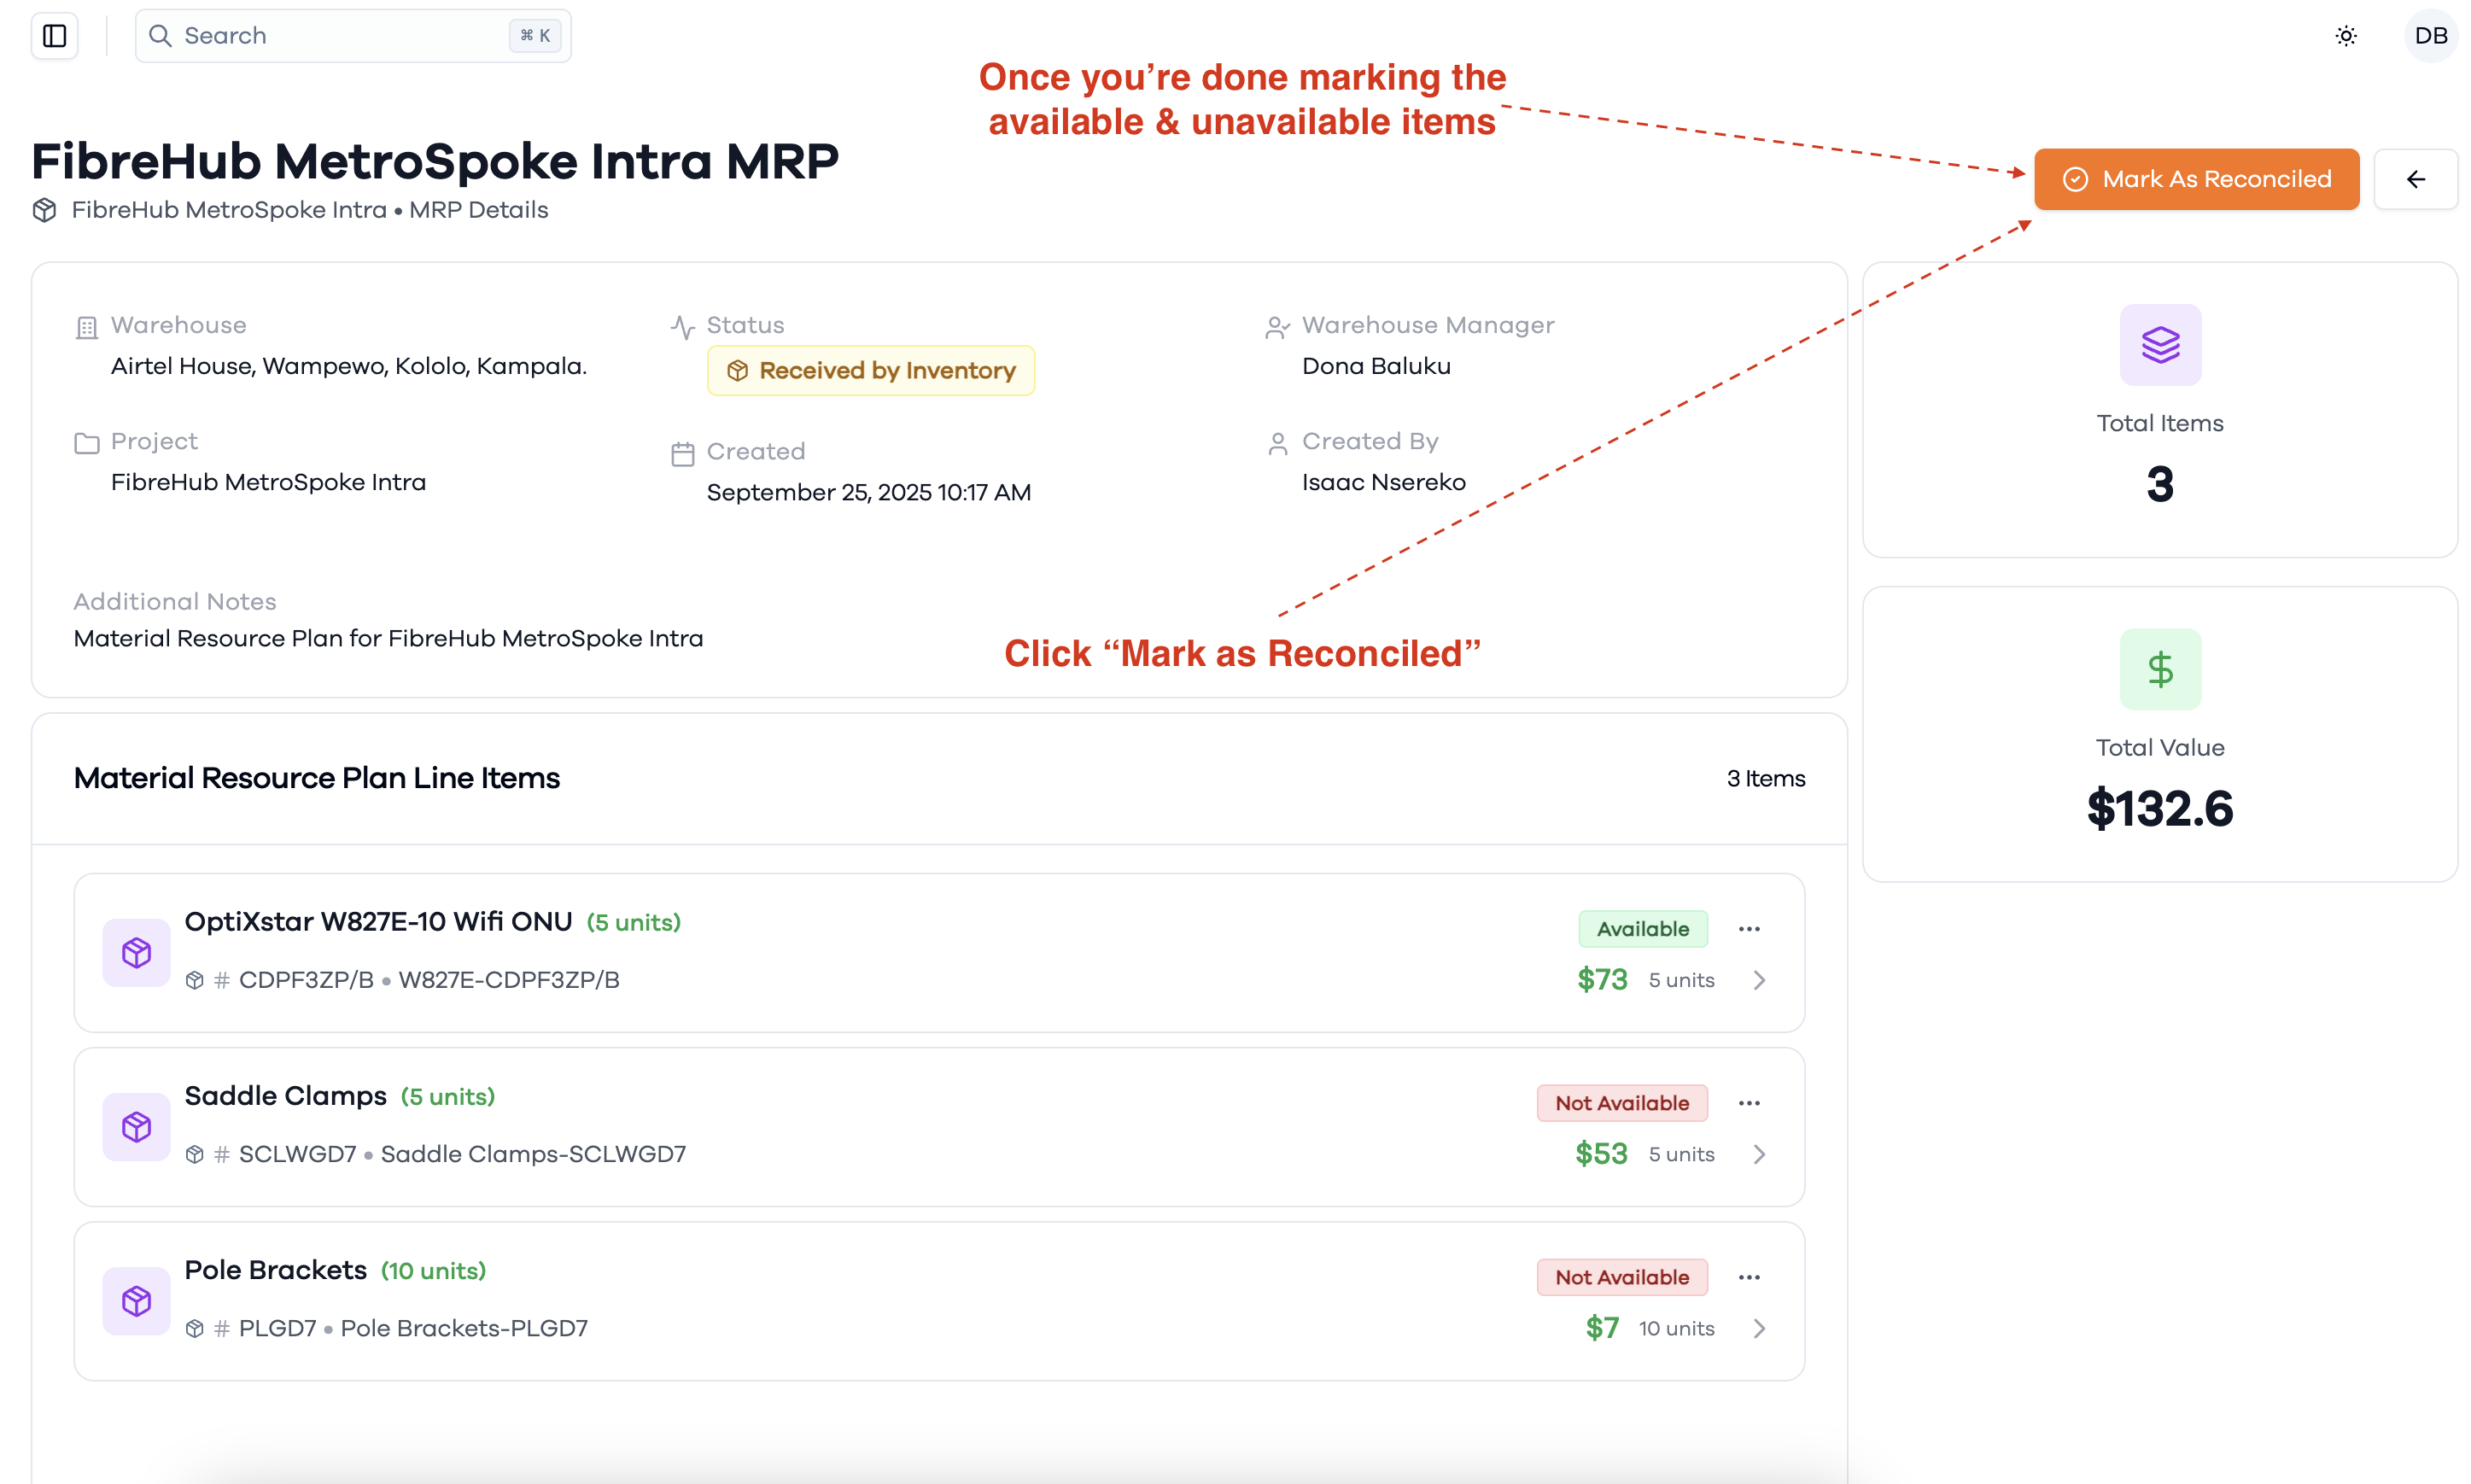
Once the warehouse manager has finished marking all line items as available or unavailable and completed any necessary reservations:
- Review the status of each item in the Material Resource Plan.
- Click the Mark as Reconciled button at the top right of the page to finalize the reconciliation process.
This action completes the MRP workflow and updates its status accordingly.